-->

Sunday, August 23, 2015

How to bind DataGrid with MS-Access database in WPF

Introduction

In Previous article we have already learn that how to connect MS-Access with windows form. Today we will take a example of binding DataGrid with MS-Access in WPF c#. Also learn how to create connection using OleDbConnection class which is exist in System.Data.OleDb namespace.

Description:

First to read, How to create Database table in Ms-Access and how to create connection with MS-Access using c#. Now, after creating the database you can create the command using OleDbCommand class which is also available in System.Data.OleDb namespace. Use OleDbDataReader Class which is used to read the database table in forward only mode. Now, Bind the DataGridView with Data Reader. Check the below mentioned code as well as video:

Database table


How to Bind Gridview with Access database in ASP.NET C#


Source code : 

<Grid>
        <DataGrid Name="grid1" HorizontalAlignment="Left" Margin="116,72,0,0" VerticalAlignment="Top" Height="201" Width="215"/>


    </Grid>

Connection String in web.config file
<connectionStrings>

    <add name ="Connection" connectionString="Provider=Microsoft.ACE.OLEDB.12.0;Data Source=E:\Dbase.accdb;Persist Security Info=False;"/>

  </connectionStrings>
Code Behind 

using System;
using System.Collections.Generic;
using System.Configuration;
using System.Data.OleDb;
using System.Linq;
using System.Text;
using System.Threading.Tasks;
using System.Windows;
using System.Windows.Controls;
using System.Windows.Data;
using System.Windows.Documents;
using System.Windows.Input;
using System.Windows.Media;
using System.Windows.Media.Imaging;
using System.Windows.Navigation;
using System.Windows.Shapes;

namespace WpfApplication1
{
    /// <summary>
    /// Interaction logic for MainWindow.xaml
    /// </summary>
    public partial class MainWindow : Window
    {
        public MainWindow()
        {
            InitializeComponent();
            loadgrid();
        }

        private void loadgrid()
        {
            OleDbConnection con = new OleDbConnection();
            con.ConnectionString=ConfigurationManager.ConnectionStrings["Connection"].ToString();
            con.Open();
            OleDbCommand cmd = new OleDbCommand();
            cmd.CommandText = "select * from [Employee]";
            cmd.Connection = con;
            OleDbDataReader rd = cmd.ExecuteReader();
            grid1.ItemsSource = rd;
        }
    }
}

Saturday, August 22, 2015

How to Bind Gridview with Access database in ASP.NET C#

Introduction

In Previous article we have already learn that how to connect MS-Access with windows form. Today we will take a example of binding Gridview with MS-Access in asp.net c#. Also learn how to create connection using OleDbConnection class which is exist in System.Data.OleDb namespace.

Description:

First to read, How to create Database table in Ms-Access and how to create connection with MS-Access using c#. Now, after creating the database you can create the command using OleDbCommand class which is also available in System.Data.OleDb namespace. Use OleDbDataReader Class which is used to read the database table in forward only mode. Now, Bind the DataGridView with Data Reader. Check the below mentioned code as well as video:


Database table


How to Bind Gridview with Access database in ASP.NET C#


Source code : 

<%@ Page Language="C#" AutoEventWireup="true" CodeFile="Default6.aspx.cs" Inherits="Default6" %>

<!DOCTYPE html>

<html xmlns="http://www.w3.org/1999/xhtml">
<head runat="server">
    <title></title>
</head>
<body>
    <form id="form1" runat="server">
    <div>
    
    </div>
        <asp:GridView ID="GridView1" runat="server">
        </asp:GridView>
    </form>
</body>
</html>

Connection String in web.config file
<connectionStrings>

    <add name ="Connection" connectionString="Provider=Microsoft.ACE.OLEDB.12.0;Data Source=E:\Dbase.accdb;Persist Security Info=False;"/>

  </connectionStrings>
Code Behind 

using System;
using System.Configuration;
using System.Data.OleDb;
using System.Web.UI;

public partial class Default6 : System.Web.UI.Page
{
    protected void Page_Load(object sender, EventArgs e)
    {
        if(!Page.IsPostBack)
        {
            loadgrid();
        }
    }

    private void loadgrid()
    {
        OleDbConnection con = new OleDbConnection();
        con.ConnectionString = ConfigurationManager.ConnectionStrings["Connection"].ToString();
        con.Open();
        OleDbCommand cmd = new OleDbCommand();
        cmd.CommandText = "Select * from [Employee]";
        cmd.Connection = con;
        OleDbDataReader rd = cmd.ExecuteReader();
        GridView1.DataSource = rd;
        GridView1.DataBind();
    }
}

Thursday, August 20, 2015

How to Bind DataGridView with MS-Access in windows form c#

Introduction

In Previous article we have already learn that how to connect MS-Access with windows form. Today we will take a example of binding DataGridView with MS-Access. Also learn how to create connection using OleDbConnection class which is exist in System.Data.OleDb namespace.

Description:

First to read, How to create Database table in Ms-Access and how to create connection with MS-Access using c#.


Now, after creating the database you can create the command using OleDbCommand class which is also available in System.Data.OleDb namespace. Use DataSet Class which is used to load the database table to in-memory. Now, Bind the DataGridView with DataSet Table. Check the below mentioned code as well as video:


using System;
using System.Collections.Generic;
using System.ComponentModel;
using System.Data;
using System.Drawing;
using System.Linq;
using System.Text;
using System.Threading.Tasks;
using System.Windows.Forms;
using System.Data.OleDb;
using System.Configuration;

namespace ConnectAccessDatabase
{
    public partial class Form1 : Form
    {
        public Form1()
        {
            InitializeComponent();
            loadgrid();
        }

        private void loadgrid()
        {
            OleDbConnection con = new OleDbConnection();
            con.ConnectionString = ConfigurationManager.ConnectionStrings["Connection"].ToString();
            con.Open();
            MessageBox.Show("Connection Sucess");
            OleDbCommand cmd = new OleDbCommand();
            cmd.CommandText = "Select * from [Employee]";
            cmd.Connection = con;
            OleDbDataAdapter da = new OleDbDataAdapter(cmd);
            DataSet ds = new DataSet();
            da.Fill(ds);
            dataGridView1.DataSource = ds.Tables[0];

        }
    }
}

How to connect Microsoft Access Database to Windows Form c#

Introduction
In this article we will learn how to connect access database to windows form application. Get the MS Access data in windows form application. Access is a database system or you can its a tool of MS-Office. Through this we can store data permanently in it. If you want to store data in it by the help of windows application then you should connect it with the application.

Description
If you want to connect the database with the windows form application then you must to install the MS- Access in the computer. Also must to install connection drivers properly. Now, follow the instruction to connect ms-access database to windows form c#.

  1. First to prepare a database file in MS-Access.
  2. Add a windows form project Using Visual Studio 2013 or earlier.
  3. Add a Method just after Initializing Component. Like 


using System;
using System.Collections.Generic;
using System.ComponentModel;
using System.Data;
using System.Drawing;
using System.Linq;
using System.Text;
using System.Threading.Tasks;
using System.Windows.Forms;
using System.Data.OleDb;
using System.Configuration;

namespace ConnectAccessDatabase
{
    public partial class Form1 : Form
    {
        public Form1()
        {
            InitializeComponent();
            loadgrid();
        }

        private void loadgrid()
        {
            OleDbConnection con = new OleDbConnection();
            con.ConnectionString = ConfigurationManager.ConnectionStrings["Connection"].ToString();
            con.Open();
            MessageBox.Show("Connection Sucess");
  

        }
    }
}

Monday, August 17, 2015

Get the page name example in asp.net c#

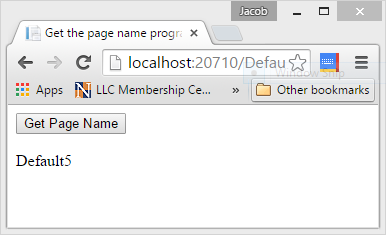
In this article i will learn how to get the page name in asp.net. If you are using visual studio 2005 to 2010 then url show page name with extension. But if you are using vs2012 to vs2015 then do not show. Lets check the example of  get page name from page url.


<%@ Page Language="C#" AutoEventWireup="true" CodeFile="Default5.aspx.cs" Inherits="Default5" %>

<!DOCTYPE html>

<html xmlns="http://www.w3.org/1999/xhtml">
<head runat="server">
    <title>Get the page name program in asp.net</title>
</head>
<body>
    <form id="form1" runat="server">
    <div>
        <asp:Button ID="Button1" runat="server" Text="Get Page Name" OnClick="Button1_Click" />
        <br />
        <br />
        <asp:Label ID="lblresult" runat="server" Text=""></asp:Label>
    </div>
    </form>
</body>
</html>
Code Behind
using System;
using System.IO;

public partial class Default5 : System.Web.UI.Page
{
    protected void Page_Load(object sender, EventArgs e)
    {

    }
    protected void Button1_Click(object sender, EventArgs e)
    {
        string pagename = Path.GetFileName(Request.Path);
        lblresult.Text = pagename;
    }
}

Code generate the following output


Get the page name in asp.net c#

Sunday, August 16, 2015

Random password generator software free download

Introduction

This software is used to generate random password. Free download random password generator software. Through this password generator you can generator long string password like this

Password: Asdfrte,./7864@3k#
Example of long/strong/good password. If you want to know about this software that how it work?
First to run the executable file and open the software in windows environment and put some number like 15. After entered you get 15 character long string password.
How to design the software:
First to create a new project in visual studio , File-->New-->Project-->Windows form (c# Language). Design a form with one label, one TextBox, one button control. When you press the button then you get long string password. So put this code on Button click.

using System;
using System.Collections.Generic;
using System.ComponentModel;
using System.Data;
using System.Drawing;
using System.Linq;
using System.Text;
using System.Threading.Tasks;
using System.Windows.Forms;

namespace RandomPasswordGenerator
{
    public partial class Form1 : Form
    {
        public Form1()
        {
            InitializeComponent();
        }

        private void button1_Click(object sender, EventArgs e)
        {
            string randomstring = string.Empty;
            char[] array = "0123456789qwertyuiopasdfghjklzxcvbnmQWERTYUIOPASDFGHJKLZXCVBNM[];,.?@#$%^&*()".ToCharArray();
            Random r1 = new Random();
            int getnumber = Convert.ToInt32(textBox1.Text);
            for(int i=0;i<getnumber;i++)
            {
                int point = r1.Next(1, array.Length);
                if (!randomstring.Contains(array.GetValue(point).ToString()))
                    randomstring += array.GetValue(point);
                else
                    i--;
            }
            lblresult.Text = randomstring;
        }
    }
}


Code Generate the following output
Random password generator software download

Saturday, August 15, 2015

ZoomIn and ZoomOut Text Example using JQuery

Introduction: 

Here I will explain example of Text ZoomIn or ZoomOut example using JQuery or increase or decrease font size of blog/website dynamically on button click using jQuery in asp.net.

Description: 
 
In previous articles I explained ajax password strength validator and checker. This all things are related to Jquery. To read more article about JQuery which is implemented in asp.net.

To implement this we need to write the following code in aspx page


<%@ Page Language="C#" AutoEventWireup="true" CodeFile="Default4.aspx.cs" Inherits="Default4" %>

<!DOCTYPE html>

<html xmlns="http://www.w3.org/1999/xhtml">
<head runat="server">
    <title></title>
    <script type="text/javascript" src="http://ajax.googleapis.com/ajax/libs/jquery/1.7.2/jquery.min.js"></script>
    <script>
        $(document).ready(function () {
            var getdiv = $('#test');

            //get zoomin button

            $('#zoomin').click(function () {

                var presentsize = getdiv.css('fontSize');
                var latestsize = parseInt(presentsize.replace("px", "")) + 1;
                $(getdiv).css("fontSize",latestsize + "px");

            });

            //get zoomout button

            $('#zoomout').click(function () {

                var presentsize = getdiv.css('fontSize');
                var latestsize = parseInt(presentsize.replace("px", "")) - 1;
                $(getdiv).css("fontSize", latestsize + "px");

            });

        })

    </script>
</head>
<body>
    <form id="form1" runat="server">
    <div id="test">
        Welcome to my blog: http://dotprogramming.blogspot.com
 
    </div>
        <input id="zoomin" type="button" value="+" />
        <input id="zoomout" type="button" value="-" />
    </form>
</body>
</html>

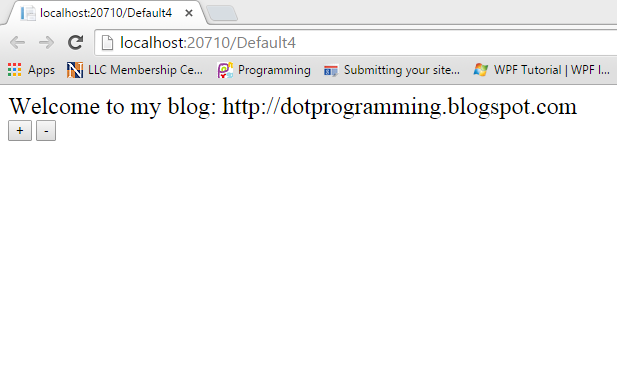
Code Generate the following output:

ZoomIn and ZoomOut Text Example using JQuery

© Copyright 2013 Computer Programming | All Right Reserved