-->

Tuesday, April 30, 2013

Student Information System Project in C#

Introduction About Project
Student information system project is a way of represent student bio data in different - different ways.It having all such features like add new student record , student bio data, student profile etc. Suppose you have a big Educational institute ,on that time you will need a such type of system when handle all such activities related to students and Organization. So let first we think about students management. This project handle student activities.


Your project will submit after 5 hour 

Monday, April 29, 2013

How to use SliderExtender in AJAX

SliderExtender attaches to a TextBox control and enables the TextBox control to behave similar to a graphical Slider so that the users can pick up a numeric values up to a specific range. The website SliderExtender makes the concept of SliderExtender clear.


lets take an Example

Copy this code and paste your web form ( Before copy you must add ajax control tool kit to your project )


<%@ Page Language="C#" %>

<%@ Register Assembly="AjaxControlToolkit" Namespace="AjaxControlToolkit" TagPrefix="asp" %>

<!DOCTYPE html>

<script runat="server">

</script>

<html xmlns="http://www.w3.org/1999/xhtml">
<head runat="server">
    <title></title>
</head>
<body>
    <form id="form1" runat="server">
    <div>
        <asp:ScriptManager ID="ScriptManager1" runat="server"></asp:ScriptManager>
        <asp:UpdatePanel ID="UpdatePanel1" runat="server">
            <ContentTemplate >
        <asp:Label ID="Label1" runat="server" Text="Move the slider to see its working"></asp:Label>
&nbsp;<asp:TextBox ID="TextBox2" runat="server"></asp:TextBox>
        <asp:TextBox ID="TextBox3" runat="server"></asp:TextBox>
        <asp:SliderExtender ID="SliderExtender1" runat="server" Minimum ="0" Maximum ="100" EnableHandleAnimation ="true" Orientation ="Horizontal" TooltipText ="Move Slider" TargetControlID ="TextBox2" BoundControlID ="TextBox3" Steps ="100" ></asp:SliderExtender>
    </ContentTemplate></asp:UpdatePanel>
    </div>
         </form>
</body>
</html>

Output:


How to use SliderExtender in AJAX


Properties of SliderExtender Control

TargetControlID :  Sets the ID control which you want to attach with the extender.

Minium : Sets the minimum value allowed by the extender.

Maximum : Set the maximum value allowed by the extender.

Decimals : Specifies number of decimal digits for the value.

Steps: Specifies number of discrete values in the slider's range.

Value : Specifies the current value of the slider.

EnableHandleAnimation : Enables or disables the handle animation by setting its value to true or false respectively.

HandleAnimationDuration : sets the time in miliseconds for the handle animation to occurs.

RailCssClass : Set the name of the css class for the slider's rail.

HandleCssClass : Set the name of the css class for the slider's handle.

HandleImageURL : Set the URL of the image that you want to use as a slider handle.

Length : Set the dimension (Width or height ) of the slider (horizontal or vertical).

BoundControlID : Set the ID of the control that displays the current value of the slider.

Monday, April 22, 2013

How to use ResizableControlExtender in AJAX

ResizableControlExtender is attached to any ASP.NET control on a web page that allow resizing the control using a handle attached to the lower-right corner of the control. The user resizes the control similar to windows Explorer in operating system. The style can be changed using the HandleCssClass property.
ResizableControlExtender also exposes the events,such  as OnClientResize that can trigger JavaScript .

lets take an Example

Copy this code and paste your web form ( Before copy you must add ajax control tool kit to your project )


<%@ Page Language="C#" AutoEventWireup="true" CodeFile="autoresize.aspx.cs" Inherits="autoresize" %>
<%@ Register assembly="AjaxControlToolkit" namespace="AjaxControlToolkit" tagprefix="asp" %>
<!DOCTYPE html PUBLIC "-//W3C//DTD XHTML 1.0 Transitional//EN" "http://www.w3.org/TR/xhtml1/DTD/xhtml1-transitional.dtd">

<html xmlns="http://www.w3.org/1999/xhtml">
<head runat="server">
    <title></title>
    <style >
    .handle
{
width:10px;
height:10px;
display :block ;
background-color:green;
}

</style>
</head>
<body>
    <form id="form1" runat="server">
    <div>
       <asp:ScriptManager runat="server" ID="scriptManager" />
        <div>
            <asp:Panel ID="Panel1" runat="server" Style="width: 300px; height: 200px;">

                <asp:Label ID="image1" runat="server" Text="ResizableControlExtender is attached to any ASP.NET control on a web page that allow resizing the control using a handle attached to the lower-right corner of the control. The user resizes the control similar to windows Explorer in operating system. The style can be changed using the HandleCssClass property.
ResizableControlExtender also exposes the events,such  as OnClientResize that can trigger JavaScript.">
                </asp:Label>

        </asp:Panel>


        <asp:ResizableControlExtender ID="ResizableControlExtender1" runat="server"

TargetControlID="Panel1" HandleCssClass="handle"  MaximumHeight="400" MaximumWidth="500"

MinimumHeight="100" MinimumWidth="100" HandleOffsetX="5" HandleOffsetY="5" />
    </div>

    </div>
    </form>
</body>
</html>


How to use ResizableControlExtender in AJAX


Properties of ResizableControlExtender control

ResizableCssClass: Sets the name of the css class that is applied to the control while resizing.

MinimumWidth: Sets the minimum width of the resizable control.

MinimumHeight : Sets the minimum height of the resizable control.

MaximumWidth : Sets the maximum width of the resizable control.

MaximumHeight : Sets the Maximum height of the resizable control.

OnClientResizeBegin : Specifies the event name that is fired when the control start resizing.

OnClientResizing : Specifies the event name that is fired when the control is begin resized.

OnClientResize : Specifies the event name that is fired when the control has been resized.

HandleOffsetX : Sets the distance of the resize handle from the control relative to X axis.

HandleOffsetY : Sets the distance of the resize handle from the control relative to Y axis.

Sunday, April 21, 2013

How to use NumericUpDownExtender in AJAX

Introduction

NumericUpDownExtender targets a TextBox Control to extend the functionality of the textbox . When this extender is attached to a TextBox control , the textbox appear with an up and down button . You can use these buttons to navigate through a defined set of string values as well as integer value . The string values are defined using the RefValues property of NumericUpDownExtender and integer value defined by minimum and maximum property.

Source Code

Copy this code and paste your web form ( Before copy you must add ajax control tool kit to your project )

<%@ Page Language="C#" %>

<%@ Register Assembly="AjaxControlToolkit" Namespace="AjaxControlToolkit" TagPrefix="asp" %>


<!DOCTYPE html>


<script runat="server">


</script>


<html xmlns="http://www.w3.org/1999/xhtml">

<head runat="server">
    <title></title>
</head>
<body>
    <form id="form1" runat="server">
    <div>
        <asp:ScriptManager ID="ScriptManager1" runat="server"></asp:ScriptManager>
    
        <asp:Label ID="Label1" runat="server" Text="Increse or decrease your counter"></asp:Label>
&nbsp;
        <asp:TextBox ID="TextBox1" runat="server" Height="19px" Width="229px"></asp:TextBox>
        <br />
        <br />

        Select your month


        <asp:TextBox ID="TextBox2" runat="server" Height="19px" Width="232px"></asp:TextBox>


        <asp:NumericUpDownExtender ID="NumericUpDownExtender1" runat="server" Width ="100" Step ="10" Maximum ="100" Minimum ="1" TargetControlID ="TextBox1"></asp:NumericUpDownExtender>


        <asp:NumericUpDownExtender ID="NumericUpDownExtender2" runat="server" Width ="100" Step="1" TargetControlID ="TextBox2" RefValues ="jan;feb"></asp:NumericUpDownExtender>

        <br />
    </div>

    </form>

</body>
</html>

OutPut

How to use NumericUpDownExtender in AJAX


Properties of NumericUpDownExtender:

TargetControlID : Set the ID for the TextBox control to which you want to attach the extender.

Width : Sets the combined size of the TextBox control and the Up and Down Buttons. If you use custom buttons, then you do not need to set the width.

RefValues: Set a list of strings separated by semicolons ,which you want to display when the up or down button is clicked.

Step: Sets the Steps for numeric increment and decrement . The Default value is 1

TargetButtonDownID : Set the ID of the custom Down button .

TargetButtonUpID : Set the ID of the custom Up button.

Minimum : Set the minimum value allowed by the extender to navigate.

Maximum : Set the maximum value allowed by the extender to navigate.

Saturday, April 20, 2013

How to use CalendarExtender in AJAX

CalendarExtender targets a TextBox control and provides an easy way to enter the date in the textbox . When you associate a CalendarExtender to the textbox control , you do not need to enter the date manually. However , you can select the date from the calendar that appears as you focus on the textbox . The CalendarExtender enables you to customize the date format end choose the date using popup calender . You can interact with the calendar by selecting a date and month , or changing the view of the calender , and much more.

lets take an Example


  Copy this code and paste your web form ( Before copy you must add ajax control tool kit to your project )


<%@ Page Language="C#" %>

<%@ Register Assembly="AjaxControlToolkit" Namespace="AjaxControlToolkit" TagPrefix="asp" %>

<!DOCTYPE html>

<script runat="server">

</script>

<html xmlns="http://www.w3.org/1999/xhtml">
<head runat="server">
    <title></title>
</head>
<body>
    <form id="form1" runat="server">
    <div>
 
        <asp:ScriptManager ID="ScriptManager1" runat="server">
        </asp:ScriptManager>
        <br />
        <asp:TextBox ID="TextBox1" runat="server" Height="23px" Width="168px"></asp:TextBox>
        <asp:Button ID="Button1" runat="server" Text="Cal" />
        <asp:CalendarExtender ID="CalendarExtender1" runat="server" TargetControlID ="TextBox1" PopupButtonID ="Button1" Format ="d/MMMM/yyyy"></asp:CalendarExtender>
    </div>
    </form>
</body>
</html>

OutPut


Property of the CalendarExtender Control

TargetControlID : Set the ID of the textbox control to which the extender is attached .

Format : Sets the Format string to display the selected date

PopupButtonID : Set the ID for the control using which you want to display the calendar pop-up . If this value has not been , the calendar pop-up appears by focusing the TextBox control.

PopupPosition : Set the position where the pop-up appear in the text box . The default value is BottomLeft.

SelectedDate : Set the date which is selected when the Calendar initialize.

Thursday, April 18, 2013

How to use AlwaysVisibleControlExtender in AJAX

Introduction

AlwaysVisibleControlExtender enables you to fix a given control to one of the page corner so that the control appears to float in the background when the page is scrolled or re-sized . This extender can target any of the controls that you want to be visible on the page always.

Lets take an Example


Copy This code and paste your web form (Before copy you must add ajax control tool kit to your project)


<%@ Page Language="C#" AutoEventWireup="true" CodeFile="customlogincontrol.aspx.cs" Inherits="customlogincontrol" %>

<%@ Register Assembly="AjaxControlToolkit" Namespace="AjaxControlToolkit" TagPrefix="asp" %>

<!DOCTYPE html>

<html xmlns="http://www.w3.org/1999/xhtml">
<head runat="server">
    <title></title>
</head>
<body>
    <form id="form1" runat="server">
    <div>
 
        <asp:ScriptManager ID="ScriptManager1" runat="server">
        </asp:ScriptManager>
        <br />
        <asp:Panel ID="Panel1" runat="server">
            <asp:Image ID="Image1" runat="server" Height="118px" ImageAlign="Left" ImageUrl="~/Images/HTC.png" Width="110px" />
            Welcome to dotprogramming.blogspot.com<br />
            <asp:AlwaysVisibleControlExtender ID="AlwaysVisibleControlExtender1" runat="server" TargetControlID ="Panel1" HorizontalOffset ="10" VerticalOffset ="10" HorizontalSide ="Right" VerticalSide ="Top" ScrollEffectDuration="1.0" ></asp:AlwaysVisibleControlExtender>
            <br />
        </asp:Panel>
        <div>
        Write much more text then page has scrolled.
    </div>
    </div>
    </form>
</body>
</html>

Output:

Property of the AlwaysVisibleControlExtender 

TargetControlID : Set the ID of the control which you want to make visible

HorizontalOffset:   Set the distance of the target control to the Horizontal Side edge of the browser . The default distance is 0 pixel.

HorizontalSide :  Set the target control using the horizontal Edge of the browser ( left, center, or right) . The  Default value is left.

VerticalOffset : Set the distance of the target control to the vertical side edge of the browser . The default distance is 0 pixel.

VerticalSide:  Set the target control using the Vertical edge of the browser (Top,Middle , or Bottom ) . The default value is top.

ScrollEffectDuration :  Set the Time to last the scrolling effect while re-positioning the target control . The Default value is 0.1 second.

Sunday, April 14, 2013

Difference Between SQL Server Database (SSD) and SQL Server Management Studio(SSMS)

SQL Server Database: SSD contain all the tables and data that created by SQL Server management Object. Like Triggers,Tables, and Stored procedure etc.

Diagrammatic View of SSD:


SQL Server Management Studio : SSMS is a client tool and not the server by itself
or you can about SSMS that developer machine (Clients) connects to SQL Server using SSMS


Friday, April 12, 2013

How to send E-Mail in ASP.NET


Step-1: Open Visual Studio
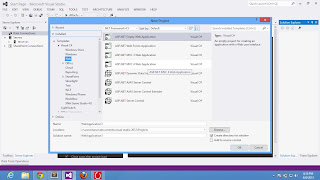
Step-2 : Create New Web Project


Step-3: In Solution Explorer Add new item 


Step-4: Select web form in middle pane also select c# in left pane

Step-5: Change name of the webform as "mailling.aspx" also select place code in separate file check box

Step-6: Download Ajax Control tool kit from 


Step-7: Right click on project and add reference to the project (add .dll file to com object)

Step-8: Also add ajax control tool kit to toolbox (By Rightclick on toolbox and choose items) 

Step-9: check this code for 


<%@ Page Language="C#" AutoEventWireup="true" CodeFile="sendmail.aspx.cs" Inherits="sendmail" %>

<%@ Register assembly="AjaxControlToolkit" namespace="AjaxControlToolkit" tagprefix="asp" %>
<%@ Register assembly="AjaxControlToolkit" namespace="AjaxControlToolkit.HTMLEditor" tagprefix="cc1" %>

<!DOCTYPE html>

<html xmlns="http://www.w3.org/1999/xhtml">
<head runat="server">
    <title></title>
    <style type="text/css">
        .auto-style1 {
            width: 99px;
        }
    </style>
</head>
<body>
    <form id="form1" runat="server">
        <asp:ScriptManager ID="ScriptManager1" runat="server"></asp:ScriptManager>
    <div>
    
        <table style="width:100%;">
            <tr>
                <td class="auto-style1">To:</td>
                <td>
                    <asp:TextBox ID="sendertxt" runat="server" Height="30px" Width="269px"></asp:TextBox>
                    <asp:RequiredFieldValidator ID="RequiredFieldValidator1" runat="server" ControlToValidate="sendertxt" Display="Dynamic" ForeColor="Maroon">Field is required </asp:RequiredFieldValidator>
                    <asp:RegularExpressionValidator ID="RegularExpressionValidator1" runat="server" ControlToValidate="sendertxt" Display="Dynamic" ForeColor="Maroon" ValidationExpression="\w+([-+.']\w+)*@\w+([-.]\w+)*\.\w+([-.]\w+)*"></asp:RegularExpressionValidator>
                </td>
                <td>&nbsp;</td>
            </tr>
            <tr>
                <td class="auto-style1">CC</td>
                <td>
                    <asp:TextBox ID="TextBox2" runat="server" Height="30px" Width="269px"></asp:TextBox>
                </td>
                <td>&nbsp;</td>
            </tr>
            <tr>
                <td class="auto-style1">BCC</td>
                <td>
                    <asp:TextBox ID="TextBox3" runat="server" Height="30px" Width="269px"></asp:TextBox>
                </td>
                <td>&nbsp;</td>
            </tr>
            <tr>
                <td class="auto-style1">Subject</td>
                <td>
                    <asp:TextBox ID="subjecttxt" runat="server" Height="30px" Width="269px"></asp:TextBox>
                    <asp:RequiredFieldValidator ID="RequiredFieldValidator2" runat="server" ControlToValidate="subjecttxt" Display="Dynamic" ForeColor="Maroon"></asp:RequiredFieldValidator>
                </td>
                <td>&nbsp;</td>
            </tr>
            <tr>
                <td class="auto-style1">Body</td>
                <td>&nbsp;</td>
                <td>&nbsp;</td>
            </tr>
            <tr>
                <td class="auto-style1">&nbsp;</td>
                <td>
                    <cc1:Editor ID="Editor1" runat="server" />
                </td>
                <td>&nbsp;</td>
            </tr>
            <tr>
                <td class="auto-style1">&nbsp;</td>
                <td>
                    <asp:Button ID="Button1" runat="server" Text="Send" Width="63px" OnClick="Button1_Click" />
                </td>
                <td>&nbsp;</td>
            </tr>
        </table>
    
    </div>
    </form>
</body>
</html>


Step-10: Add this code to code behind file


using System;
using System.Net.Mail;

public partial class sendmail : System.Web.UI.Page
{
    protected void Page_Load(object sender, EventArgs e)
    {

    }
    protected void Button1_Click(object sender, EventArgs e)
    {
        MailMessage msg = new MailMessage();
        msg.To.Add(sendertxt.Text);
        msg.From = new MailAddress("narenkumar851@gmail.com");
        msg.CC.Add(TextBox2.Text);
        msg.Bcc.Add(TextBox3.Text);
        msg.Subject = subjecttxt.Text;
        msg.Body = Editor1.Content;
        SmtpClient smt = new SmtpClient();
        smt.EnableSsl = true;
        smt.Send(msg);


    }
}


Step-11: Add this code to web.config file


<system.net>
    <mailSettings>
      <smtp>
        <network host="smtp.gmail.com" userName="your gmail user name" password="your gmail password"/>
      </smtp>
    </mailSettings>
  </system.net>

Step-12 Run this Application

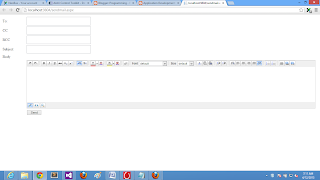
Step-13 Output


Video View: 


Friday, April 5, 2013

How to bind Formview in ASP.NET

There are different method for bind Formview in asp.net.
(1)Form bind through SqlDataSource
(2) Form bind through ADO.NET
Steps for binding formview using SqlDataSource:

Step-1: Open Visual Studio
Step-2 : Create New Web Project

How to bind Formview in ASP.NET

Step-3: In Solution Explorer Add new item 


How to bind Formview in ASP.NET
Step-4: Select web form in middle pane also select c# in left pane
Step-5: Change name of the webform as "formbind.aspx" also select place code in separate file check box
Step-6:   Right click on  Project name and add new item  again.
Step-7: Open a new dialog window Select SQL SERVER database  name as a "database.mdf"
Step-8: After click ok Button . a new dialog appear on the screen 
Do you want to place the file in App_data folder
Step-9: Click Ok Button in dialog window
Step-10: Open Server Explorer
Step-11 Make a new table inside Database

Note: Keep one primary key with identity Increase

Step-12
:
How to bind Formview in ASP.NET
Step-13: fill This Table with Some value
Step-14: Open  " formbind.aspx " page
Step-15: Drag and Drop formview control onto the formbind.aspx page from toolbox
Step-16: Click on showsmart tag and and choose dataSource(drop menu and select new datasource)
Step-17: Open a new dialog choose SQL Database in choose database type dialog also click on OK Button
Step-18: Drop menu and select exist database connection in choose your data connection


Thursday, April 4, 2013

What is Difference Between static member and non static member

Also known as static member or instance member

(1)calling
Static : Static member always call from class name.
NonStatic : NonStatic member always call from instance of the class.

Note: Those values who have not change during the entire program that values keep as a static 
Example:
In Circle class the pi=3.14 value always must constant so use pi as a static member

(2)declaration
NonStatic declaration :  float pi=3.14F;
Static declaration :  static float pi=3.14F;


(3)In case of Constructor
Static : We can't use access modifier with static constructor.
NonStatic: we use always public modifier with non static constructor.

Note: 
Static Constructor is called only once , no matter how many instances you create 
Static Constructors are called before instance constructors.


(4)In Case of memory
In instance member belongs to specific instance (object) of a class. If i create 3 objects of a class , i will have 3 sets of instance members in the memory , where as there will ever be only one copy of a static member , no matter how many instances of a class are created.

Wednesday, April 3, 2013

What is the Difference between procedure and function in VB.NET

(1)
Procedure: Procedure does not return a value.
Function : Function does return a value.

(2)
Procedure: Use 'sub' keyword for creating procedure
Function : Function use 'function' Keyword for creating function.


What is the Difference between ASP and ASP.NET

There are many difference in asp and asp.net
(1)
ASP : If you want to make a project then you write more code compare to ASP.NET
ASP.NET : Write Less code compare to ASP

(2)
ASP: ASP use Recordset  for data binding
ASP.NET : ASP use ado.net, entity framework and many more for data binding

(3)
ASP: ASP does not support rich control like calander control
ASP.NET : ASP.NET support rich control

(4)
ASP: ASP have only one page for designing and coding (presentation + business logic on single page)
ASP.NET : ASP.NET have two pages for designing and coding (presentation page (.aspx) + business logic page (.aspx.cs))

(5)
ASP:  ASP version 1.0 or 1.1
ASP.NET :  Updated Version


Tuesday, April 2, 2013

© Copyright 2013 Computer Programming | All Right Reserved