Step-1: Open Visual Studio IDE
Step-2 : Create New Web Project
Step-10: Open Server Explorer
Step-11 Make a new table inside Database
Step-12:
Step-13: fill This Table with Some value
Step-14: Open " labelbind.aspx " page
Step-15: Drag and Drop label control onto the labelbind.aspx page from toolbox
Step-16: Add this code in Design page
<%@ Page Language="C#" AutoEventWireup="true" CodeFile="labelbind.aspx.cs" Inherits="labelbind" %>
<!DOCTYPE html>
<html xmlns="http://www.w3.org/1999/xhtml">
<head runat="server">
<title></title>
</head>
<body>
<form id="form1" runat="server">
<div>
<asp:Label ID="Label1" runat="server" Text="">
UserId:<%# myname %>
</asp:Label>
</div>
</form>
</body>
</html>
Step-17 Add this code in .cs fileStep-2 : Create New Web Project
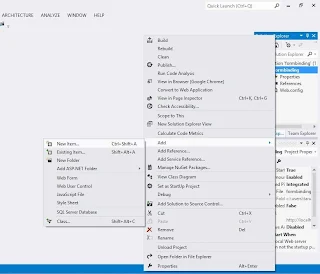
Step-3: In Solution Explorer Add new item
Step-4: Select web form in middle pane also select c# in left pane
Step-5: Change name of the webform as "labelbind.aspx" also select place code in separate file check box
Step-6: Right click on Project name and add new item again.
Step-7: Open a new dialog window Select SQL SERVER database name as a "database.mdf"
Step-8: After click ok Button . a new dialog appear on the screen
Do you want to place the file in App_data folderStep-9: Click Ok Button in dialog window
Step-10: Open Server Explorer
Step-11 Make a new table inside Database
Step-12:
Step-13: fill This Table with Some value
Step-14: Open " labelbind.aspx " page
Step-15: Drag and Drop label control onto the labelbind.aspx page from toolbox
Step-16: Add this code in Design page
<%@ Page Language="C#" AutoEventWireup="true" CodeFile="labelbind.aspx.cs" Inherits="labelbind" %>
<!DOCTYPE html>
<html xmlns="http://www.w3.org/1999/xhtml">
<head runat="server">
<title></title>
</head>
<body>
<form id="form1" runat="server">
<div>
<asp:Label ID="Label1" runat="server" Text="">
UserId:<%# myname %>
</asp:Label>
</div>
</form>
</body>
</html>
using System;
using System.Data.SqlClient;
public partial class labelbind : System.Web.UI.Page
{
public string myname;
SqlConnection con = new SqlConnection();
SqlCommand cmd = new SqlCommand();
protected void Page_Load(object sender, EventArgs e)
{
con.ConnectionString = @"Data Source=(LocalDB)\v11.0;AttachDbFilename=|DataDirectory|\Database.mdf;Integrated Security=True";
con.Open();
cmd.CommandText = "select * from [Employee]";
cmd.Connection = con;
SqlDataReader rd = cmd.ExecuteReader();
while (rd.Read())
{
myname = rd["Emp_Name"].ToString ();
}
this.DataBind();
}
}


