-->

Friday, July 15, 2016

JQuery Notification bar on top of the page

JQuery Notification bar on Top of the web page. This is the new thing in the mind i.e when we click on hyperlink then show a division with some message on top of the web page. The logic behind the thing is too much simple, In JQuery we have two method slideUp( ) and slideDown( ) , which are used for animation.  In this article , i have used both.

Application of the article:

  1. If you want to give special notice on website then you can use it.
  2. Use it in Current News Section.

<!DOCTYPE html>
<html xmlns="http://www.w3.org/1999/xhtml">
<head>
    <title>JQuery: Notification bar Example </title>
    <script src="Scripts/jquery-1.10.2.js"></script>
    <script>
        $(function () {
            $("#Button1").click(function () {
                $("#NotificationDiv").slideUp('slow');
            });


            $("#ShowNotificationBar").click(function () {
                $("#NotificationDiv").slideDown('slow');
            });


        });
    </script>
    <style>
.NotficationBar{
    background-color:blue;
    color:white;
    position:absolute;
    width:100%;
    top:0px;
    left:0px;
    text-align:center;
    border-bottom-width:3px;
    border-bottom-color:#000000;
    border-bottom-style:solid;
    padding:15px;
}


    </style>
</head>
<body>
    <div id="NotificationDiv" class="NotficationBar">
        <label>Welcome to dotprogramming.blogspot.com</label>
        <br/>
        <input type="button" id="Button1" value="close"/>
            </div>
    <div>
        <a href="" id="ShowNotificationBar">Show Notification Bar </a>
    </div>
</body>
</html>

Saturday, June 25, 2016

jQuery Autocomplete List appear onFocus TextBox

In this example i will show you, How to show array list when we focus on TextBox. I mean to say that array list contain users name and its show when we focus on TextBox. Here we have a simple example which is contain list of users name, also i have a autocomplete function in Script library . I have a video , you can check for implementation as well as output.


<!DOCTYPE html>
<html xmlns="http://www.w3.org/1999/xhtml">
<head>
    <title></title>
    <link rel="stylesheet" href="//code.jquery.com/ui/1.12.0-rc.2/themes/base/jquery-ui.css">
    <script src="//code.jquery.com/jquery-1.11.3.js"></script>
    <script src="//code.jquery.com/ui/1.12.0-rc.2/jquery-ui.min.js"></script>
    <script>
        $(function () {
            var users = ['jacob lefore', 'Bill', 'smith wick', 'ammey', 'rodkils', 'BillSmith'];
            $('#TextBox1').autocomplete({
                source: users,
                minLength:0
            }).focus(function () {
                $(this).autocomplete("Search", "");
            })
        })


    </script>
</head>
<body>
    Enter name: <input type="text" id="TextBox1" placeholder="TextBox Focus"/>
</body>
</html>

Tuesday, May 31, 2016

Calendar Control with Disabled past date

In this article, i will show you, how to show calendar control with disabled past date. I mean to say that if you select date then calendar control disabled all previous day. Also i will provide you, After select a specific date then you don't move to previous months. Lets see an example.

Before example i will teach you about calendar control. If you write following function then you can see full calendar control. If you want to disabled previous date after select specific date then see next example.
$(function () {
           $("input[id*='calid']").datepicker();
       })
Disabled Previous Date:
  $(function () {
           $("input[id*='calid']").datepicker({
               minDate: new Date(2016,6,1)
           });
       })


<html xmlns="http://www.w3.org/1999/xhtml">
<head>
    <title>Calendar Control with Disabled past date</title>
    <link rel="stylesheet" href="//code.jquery.com/ui/1.11.4/themes/smoothness/jquery-ui.css" />
    <script src="//code.jquery.com/jquery-1.10.2.js"></script>
    <script src="//code.jquery.com/ui/1.11.4/jquery-ui.js"></script>
   <script>

       $(function () {
           $("input[id*='calid']").datepicker({

               minDate: new Date(2016,6,1)
           });
       })


   </script>


</head>
<body>
    <form id="form1">
        <input type="text" id="calid" />
     </form>
</body>
</html>

Code Generate the Following code


Calendar Control with Disabled past date


Saturday, May 14, 2016

JQuery Bind function handles Click, DblClick, MouseEnter and MouseLeave Event

In this article i will show you how to use Bind( ) function in JQuery. Bind function is used to call events using string or triggers. I mean to say that  either you can pass event directly in the method or externally using triggers. In this example, i will show you click , double click , Mouse Enter and Mouse Leave event directly in Bind Function. In this example i will show you , when cursor moves on paragraph boundary then class toggle with different color. Lets check this example.
<%@ Page Language="C#" AutoEventWireup="true" CodeFile="Default7.aspx.cs" Inherits="Default7" %>

<!DOCTYPE html>

<html xmlns="http://www.w3.org/1999/xhtml">
<head runat="server">
    <title></title>
    <style>
        p{
            background-color:red;
            padding:5px;
            font-size:larger;
        }
        .over{
            color:white;
            background-color:blue;
        }
        span{
            color:green;
        }
    </style>
    <script src="Scripts/jquery-1.10.2.js"></script>
    <script>
        $(function () {
            $("p").bind("click", function (event) {
                var string = "Get Cordinate" + event.pageX + "and" + event.pageY;
                $("span").text("single Clicked " + string);

            });

            $("p").bind("dblclick", function (event) {
           
                $("span").text("Double Clicked " + this.nodeName);

            });

            $("p").bind("mouseenter mouseleave", function (event) {

                $(this).toggleClass("over");
            });


        })
    </script>
</head>
<body>
    <form id="form1" runat="server">
<p>Click, Double Click, MouseEnter and MouseLeave Event Example</p>
        <span></span>
    </form>
</body>
</html>

Monday, May 9, 2016

JQuery: Show Distinct items of DropdownList

In this article i will show you, how to remove duplicates in DropdownList when it appear on browser window. If you have multiple item in the table and you want to show only distinct items of the table then you can use siblings function of the JQuery. Lets check the simple example:


<!DOCTYPE html>

<html xmlns="http://www.w3.org/1999/xhtml">
<head runat="server">
    <title></title>
    <script src="Scripts/jquery-1.10.2.js"></script>
    <script>
        $(function () {
            $("select option").each(function () {
                $(this).siblings("[value=" + this.value + "]").remove();
            });
        });
    </script>
</head>
<body>
    <form id="form1" runat="server">
        <h2>How to Remove duplicate dropdown option elements with same value</h2>
    <div><select name="selectlist">
    <option value="">Fruit List</option>
<option value="1">Apple</option>
<option value="2">Mango</option>
<option value="1">Grapes</option>
<option value="2">Orange</option></select>
    </div>
    </form>
</body>
</html>
Code Generate the following output:

 JQuery: Show Distinct items of DropdownList

Saturday, April 16, 2016

Find some of Html Table column using JQuery

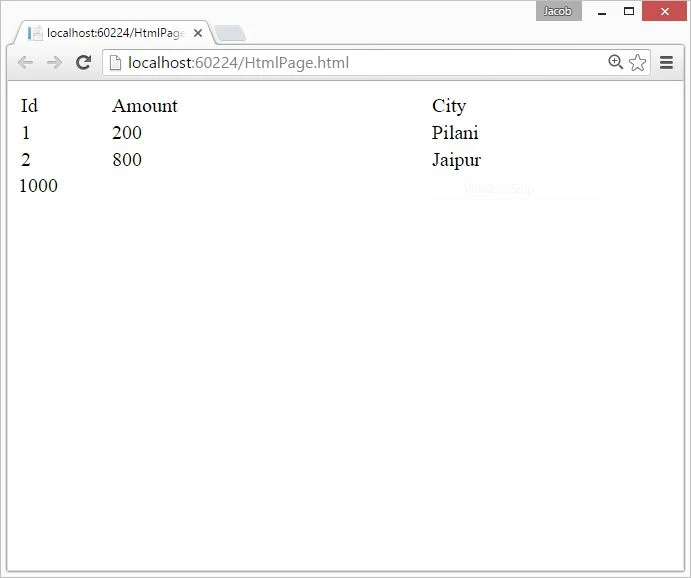
In this article i will show you how to find sum of single column of a html Table. We all know that a table contain table row and table column. Each row and column contains a cell. in this article i will use Id of the cell. We all know that id of the cell is different from other cell so we arrange id with numerical no like first cell id is amtlbl_0 and further is amtlbl_1, amtlbl_2. by using each method we can get the all ids. So the main logic is get the id which contain text like "amtlbl". In Jquery we have some technique to get the approximate id by using


 $("[id*=amtlbl]")
Check the complete source code: 

<!DOCTYPE html>
<html xmlns="http://www.w3.org/1999/xhtml">
<head>
    <title></title>
    <script src="Scripts/jquery-1.10.2.js"></script>
    <script type="text/javascript">

        $(function () {
            var grandtotal = 0;
            $("[id*=amtlbl]").each(function () {
                grandtotal = grandtotal + parseFloat($(this).html());


            })
            $("[id*=totlbl]").html(grandtotal.toString());

        });

        </script>
</head>
<body>
    <table style="width:100%;">
    <tr><td>Id</td><td>Amount</td><td>City</td></tr>
    <tr><td>1</td><td id="amtlbl_0">200</td><td>Pilani</td></tr>
    <tr><td>2</td><td id="amtlbl_1">800</td><td>Jaipur</td></tr>
    </table>
    <label id="totlbl"/>
</body>
</html>

Code generate the following output:


Find some of Html Table column using JQuery

Monday, April 4, 2016

Delete selected item from DropdownList / Select List Using JQuery

In this article i will show you how to delete selected item from DropdownList/Select List Using JQuery. We all know that select/DropdownList contain option tag for value. So, the main logic behind the question is first to get the select list by using their id property then use option tag with selected attribute after that remove.
<%@ Page Language="C#" AutoEventWireup="true" CodeFile="Default10.aspx.cs" Inherits="Default10" %>

<!DOCTYPE html>

<html xmlns="http://www.w3.org/1999/xhtml">
<head runat="server">
    <title></title>
    <script src="Scripts/jquery-1.10.2.js"></script>
    <script type="text/javascript" src="http://ajax.googleapis.com/ajax/libs/jquery/1.8.3/jquery.min.js"></script>
    <script>

        $(function () {
            $("#btdel").bind("click", function () {
                $("#fruitlist option:selected").remove();
            });
                    });


    </script>
</head>
<body>
    <form id="form1" runat="server">
    <div>
    <select id="fruitlist">

        <option value="1">Mango</option>
        <option value="2">Apple</option>
        <option value="3">Orange</option>
        <option value="4">Grapes</option>


    </select>
        <input type="button" id="btdel" value="Delete" />
    </div>
    </form>
</body>
</html>

Thursday, February 18, 2016

How to use mouseenter( ) and mouseleave( ) method in JQuery

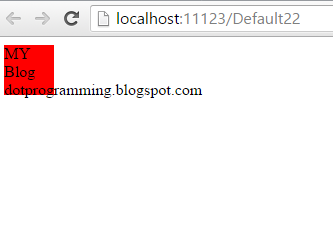
The meaning of mouse enter and mouse leave are, when your cursor enter your object bounary then mouse enter method raised similarly when your cursor goes out of your object boundary then mouse leave method raised. I will give you an example of mouse enter and mouse leave method. Lets see the example, in this, we have division, when your cursor move on your divison boundary then division background changed also text of division will be changed. This also contain mouseleave() method with the same functionality.

<%@ Page Language="C#" AutoEventWireup="true" CodeFile="Default22.aspx.cs" Inherits="Default22" %>

<!DOCTYPE html>

<html xmlns="http://www.w3.org/1999/xhtml">
<head runat="server">
    <title></title>
    <script src="Scripts/jquery-1.10.2.js"></script>
    <script>
        $(document).ready(function()
        {
            $('div').mouseenter(function () {
                $(this).css('background-color', 'green');
                $(this).html('MY website dotprograming.com')
            });


            $('div').mouseleave(function () {
                $(this).css('background-color', 'red');
                $(this).html('MY Blog dotprogramming.blogspot.com');
            })

        })

    </script>
</head>
<body>
    <form id="form1" runat="server">
    <div style="height:50px;width:50px">
    Hello World !
    </div>
    </form>
</body>
</html>

Code generates the following output


Saturday, January 30, 2016

ASP.NET GridView on JQuery Modal Popup

Introduction
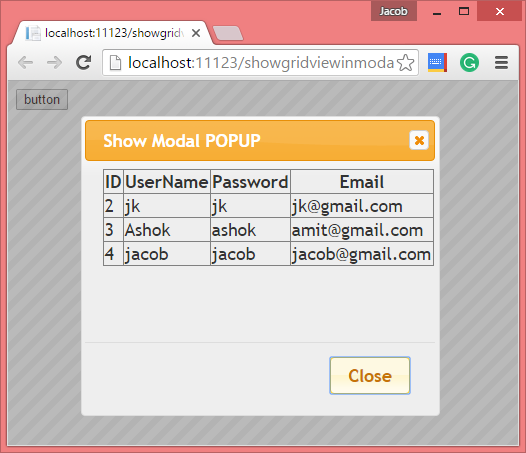
In this article, I will show you how to display GridView in modal Popup, you can say how to display a division in model popup. Here we have two javascript file, both working as reference in this example also we have a style sheet to display division in proper format. By using the dialog method we can display model popup on screen. Lets check the example of model Popup which consists of GridView.

Source Code
<%@ Page Language="C#" AutoEventWireup="true" CodeFile="showgridviewinmodalpopup.aspx.cs" Inherits="showgridviewinmodalpopup" %>

<!DOCTYPE html>

<html xmlns="http://www.w3.org/1999/xhtml">
<head runat="server">
    <title></title>
      <link href="http://code.jquery.com/ui/1.11.4/themes/ui-lightness/jquery-ui.css" rel="stylesheet" type="text/css"/>
<script type="text/javascript" src="http://code.jquery.com/jquery-1.8.2.js"></script>
<script type="text/javascript" src="http://code.jquery.com/ui/1.10.3/jquery-ui.js"></script>
  <script>
      $(function () {
          $("#Button1").click(function () {
              $("#popupdiv").dialog({
                  title: "Show Modal POPUP",
                  width: 350,
                  height: 300,
                  modal: true,
                  buttons: {
                      Close: function () {
                          $(this).dialog('close');
                      }
                  }


              });


          })


      });


  </script>
</head>
<body>
    <form id="form1" runat="server">
    <div id="popupdiv" style="display:none">
    <asp:GridView runat="server" ID="g1" AutoGenerateColumns="false">
        <Columns>
            <asp:BoundField DataField="Id" HeaderText="ID" />
            <asp:BoundField DataField="username" HeaderText="UserName" />
            <asp:BoundField DataField="Password" HeaderText="Password" />
            <asp:BoundField DataField="email" HeaderText="Email" />
        </Columns>


    </asp:GridView>
    </div>
        <input id="Button1" type="button" value="button" />
           </form>
</body>
</html>

Code-Behind File
using System;
using System.Collections.Generic;
using System.Linq;
using System.Web;
using System.Web.UI;
using System.Web.UI.WebControls;
using System.Data.SqlClient;
using System.Configuration;

public partial class showgridviewinmodalpopup : System.Web.UI.Page
{
    protected void Page_Load(object sender, EventArgs e)
    {
        if (!Page.IsPostBack)
        {
            SqlConnection con = new SqlConnection();
            con.ConnectionString = ConfigurationManager.ConnectionStrings["ConnectionStringtr"].ToString();
            con.Open();

            SqlCommand cmd = new SqlCommand();
            cmd.CommandText = "select * from [user_table]";
            cmd.Connection = con;
            SqlDataReader rd = cmd.ExecuteReader();
            g1.DataSource = rd;
            g1.DataBind();
         
        }
    }
 
}

Code Generate the following output:


Sunday, January 3, 2016

DropDownlist Bootstrap Style in ASP.NET C#

In this article, I will show you, how to add checkBoxList in DropDownList as item. I mean to say when you drop it then display item in the form of CheckBox list. You can select multiple items from CheckBox list. Selected Items show in the DropDownList header. If you want to design this types of DropDownList then add these files into your head section of page. By using these files, we can convert our ListBox into DropDownList with CheckBox Item. I will Give you complete example of Bootstrap Dropdown Menu.


<%@ Page Language="C#" AutoEventWireup="true" CodeFile="Default10.aspx.cs" Inherits="Default10" %>

<!DOCTYPE html>

<html xmlns="http://www.w3.org/1999/xhtml">
<head runat="server">
    <title></title>
    <script type="text/javascript" src="http://ajax.googleapis.com/ajax/libs/jquery/1.8.3/jquery.min.js"></script>

<link href="http://cdnjs.cloudflare.com/ajax/libs/twitter-bootstrap/3.0.3/css/bootstrap.min.css"
    rel="stylesheet" type="text/css" />

<script type="text/javascript" src="http://cdnjs.cloudflare.com/ajax/libs/twitter-bootstrap/3.0.3/js/bootstrap.min.js"></script>

<link href="http://cdn.rawgit.com/davidstutz/bootstrap-multiselect/master/dist/css/bootstrap-multiselect.css" rel="stylesheet" type="text/css" />

<script src="http://cdn.rawgit.com/davidstutz/bootstrap-multiselect/master/dist/js/bootstrap-multiselect.js" type="text/javascript"></script>
    <script>
        $(function () {
            $('[id*=list1]').multiselect({

                includeSelectAllOption:true

            });
        })


    </script>
</head>
<body>
    <form id="form1" runat="server">
    <div>
    <asp:ListBox ID="list1" runat="server" SelectionMode="Multiple">
        <asp:ListItem Text="Apple" Value="1" />
         <asp:ListItem Text="mango" Value="2" />
         <asp:ListItem Text="Grapes" Value="3" />
         <asp:ListItem Text="Orange" Value="4" />
         <asp:ListItem Text="Pea" Value="5" />


    </asp:ListBox>
        <br />
    </div>
        <asp:Button ID="Button1" runat="server" OnClick="Button1_Click" Text="GetItem" />
    </form>
</body>
</html>

Code Behind File

using System;
using System.Collections.Generic;
using System.Linq;
using System.Web;
using System.Web.UI;
using System.Web.UI.WebControls;

public partial class Default10 : System.Web.UI.Page
{
    protected void Page_Load(object sender, EventArgs e)
    {

    }
    protected void Button1_Click(object sender, EventArgs e)
    {
        string msg = string.Empty;
        foreach (ListItem item in list1.Items)
        {
            if (item.Selected)
            {
                msg += item.Text + " " + item.Value + "\\n";
            }
        }
        ClientScript.RegisterClientScriptBlock(this.GetType(), "alert", "alert('" + msg + "');", true);
    }
}

Friday, January 1, 2016

JQuery: CheckBox show/Hide password when changed

In this article, I will show you, How to show password when we select "Show PassWord" checkbox. If check box is selected then show password otherwise hide. Also I will show you, when we enter some text into the password box then entered text write on the span tag. If you want to learn that how I design it, Follow the following steps:
Step-1 :  Add two TextBox in the body section, also add one span tag and one button control.
Step-2 :  Run Jquery function, get the Id property of  password textbox, apply keyup  function on password textbox. It means when you enter some text into password box then enter text printed together with the cursor. 
Step-3 : Check whether CheckBox is checked or not. If check then write text on span tag.


Complete Code:
<!DOCTYPE html>
<html xmlns="http://www.w3.org/1999/xhtml">
<head>
    <title></title>
    <script src="http://code.jquery.com/jquery-1.10.2.js"></script>
    <script>
        $(function () {
            $('#passtxt').keyup(function () {
                var ischecked = $('#chktxt').prop('checked');
                if (ischecked) {
                    $('#spantxt').html($(this).val());
                    $('#spantxt').show();

                }
                else
                {
                    $('#spantxt').hide();
                }
            })
            $('#chktxt').change(function () {
                var ischecked = $(this).prop('checked');
                if (ischecked) {
                    $('#spantxt').show();

                }
                else
                {
                    $('#spantxt').hide();
                }
            })
        });


    </script>
    </head>
<body>
<form id="form1">
    UserName:<input type="text" id="usertxt"/><br/>
    Password:<input type="password" id="passtxt"/><br/>
    <span id="spantxt" style="display:none"></span>
    <br/>
    <input type="checkbox" id="chktxt"/>Show Password
    <input type="button" value="login"/>

</form>
</body>
</html>

Monday, October 19, 2015

Design beautiful web forms in any technology

Good morning, i am jacob, Today i have to share some post which is related to design beautiful web forms in asp.net. If you want to design web forms in asp.net then you need to learn some basic technologies like HTML, CSS, Photoshop, JQuery etc. Here, i will tech you about these technologies one by one using some web forms article. so, lets start, Following these steps to design beautiful we forms:
(Task-1)Before anything doing, must to rough stretch your website : Suppose you want to design 20 pages website then  you need 20 pages of note book. Now, stretch each web site page into your notebook. Suppose i have to design first page in my note book that is:

design beautiful web forms

Similarly do for all remaining pages. Now, your first task is completed.

(Task-2)Fill colors in stretched design: Now, come to second task that is fill colors, For beautiful web forms, must to fill different colors in the page by using color pens.

(Task-3)Design your pages by using Photoshop: By using Photoshop, you can feel exact look of your theme. So, Read some how to: articles about Photoshop by using googling. 

(Task-4)Now, start to design beautiful web forms in HTML from first page of your stretch/Photoshop page: Here, i have use web forms design in asp.net, so you need to read some article about asp.net master page. By using master page you can design your layout of all beautiful web forms.
Read more article about master page : need of master page and themes in asp.net

(Task-5) Fill colors and make responsive your design by using CSS3: if you want to design responsive and beautiful web forms then you need to learn CSS(Cascading Style Sheet). Here, i have demo of style sheet.

(Task-6) Put some Dynamic effects using JQuery into your web forms: If you have some pages which is related to login/register then use JQuery to put some dynamic effects like shadow, popups etc. I have some examples, which is related to dynamic effects like:
Dynamic effects using JQuery :  Show login form in popup using JQuery.

Saturday, October 17, 2015

jquery button created dynamically

Introduction
In this article, i will show you how to create jquery button dynamically. Example of dynamically created button using jquery. In this example, create a input tag with their attributes by using jquery. Now, after this you can append it in division.


<!DOCTYPE html>
<html xmlns="http://www.w3.org/1999/xhtml">
<head>
    <title>JQuery Button Created Dynamically</title>
    <script src="Scripts/jquery-1.10.2.js"></script>
  <script>
      $(document).ready(function () {
          var $bt=$('<input/>').attr({type:'button',name:'mybutton',value:'Dynamic Button'});
          $("#div1").append($bt);


      })

  </script>

</head>
<body>
 <div id="div1"></div>

</body>
</html>

Wednesday, October 14, 2015

Facebook see more button using JQuery

Introduction
In this article i will show you how to show 100 characters only from lots of words and remaining words or you can say characters are hide from see more words, just like facebook.com.  In facebook.com website, when we post some article which is lengthy in words then facebook.com functionality hide words just after specified length behind the see more links. Now, today i will give an example of it.


<!DOCTYPE html>
<html xmlns="http://www.w3.org/1999/xhtml">
<head>
    <title>Facebook See More and See Less</title>
    <script src="Scripts/jquery-1.10.2.js"></script>
    <script type="text/javascript">
    $(document).ready(function () {
        var sChar = 100;
        var ellipsestxt = "...";
        var moretext = "more";
        var lesstext = "less";
        $('.more').each(function () {
            var content = $(this).html();

            if (content.length > sChar) {

                var c = content.substr(0, sChar);
                var h = content.substr(sChar - 1, content.length - sChar);

                var html = c + '<span class="moreellipses">' + ellipsestxt + '&nbsp;</span><span class="morecontent"><span>' + h + '</span>&nbsp;&nbsp;<a href="" class="facebookmorelink">' + moretext + '</a></span>';

                $(this).html(html);
            }

        });

        $(".facebookmorelink").click(function () {
            if ($(this).hasClass("less")) {
                $(this).removeClass("less");
                $(this).html(moretext);
            } else {
                $(this).addClass("less");
                $(this).html(lesstext);
            }
            $(this).parent().prev().toggle();
            $(this).prev().toggle();
            return false;
        });
    });
    </script>
    <style>
        a {
            color: #0221ac;
        }

            a:visited {
                color: #02abcd;
            }

            a.facebookmorelink {
                text-decoration: none;
                outline: none;
            }

        .morecontent span {
            display: none;
        }

        .facebookseemore {
            width: 400px;
            background-color: #f0f0f0;
            margin: 10px;
        }
    </style>
 
</head>
<body>
    <div class="facebookseemore more">
<h1>Health Tips</h1>

        Fat on face or double chin suits on a person till a limited age only.
         As age of a person increases fat free face is considered more beautiful.
         Some girls do not like their fatty cheeks because it makes them look fat.
         Fat on face can increase because of many reasons like lack of water, presence
         of fat in diet and other fatty products. And for hiding it you may do make up
         but it is not the thing which gets hided easily. Today
        we are going to tell you about some such tips which can reduce fat from your face at a great extent.


    </div>
 
</body>
</html>
Code Generate the following output
Facebook see more button using JQuery


Saturday, October 10, 2015

Jquery watermark text of textbox example

In this article i will show you, water text of textBox using JQuery. i will give you an example of it. When first time browser load, all textbox generate a function, which are contains title of the textbox. Also add a class with all textboxes. Lets see the example of JQuery Watermark text:


<!DOCTYPE html>
<html xmlns="http://www.w3.org/1999/xhtml">
<head>
    <title></title>
    <style>
        .text-based{
            color:#808080;
            font-weight:bold;

        }

    </style>

    <script src="Scripts/jquery-1.10.2.js"></script>
    <script>
        $(document).ready(function () {
            $('input[type="text"]').each(function () {

                this.value = $(this).attr('title');
                $(this).addClass('text-based');

                $(this).focus(function () {

                    if (this.value == $(this).attr('title')) {

                        this.value = '';
                        $(this).removeClass('text-based');
                    }


                });
                $(this).blur(function () {
                    if (this.value == '') {
                        this.value = $(this).attr('title');
                        $(this).addClass('text-based');

                    }

                })
            })

        });

    </script>
</head>
<body>
    UserName: <input type="text" value="" name="username" title="Enter UserName"/>
</body>
</html>

Code Generate the following output:


Jquery watermark text of textbox example

Friday, October 9, 2015

JQuery: image tag created dynamically

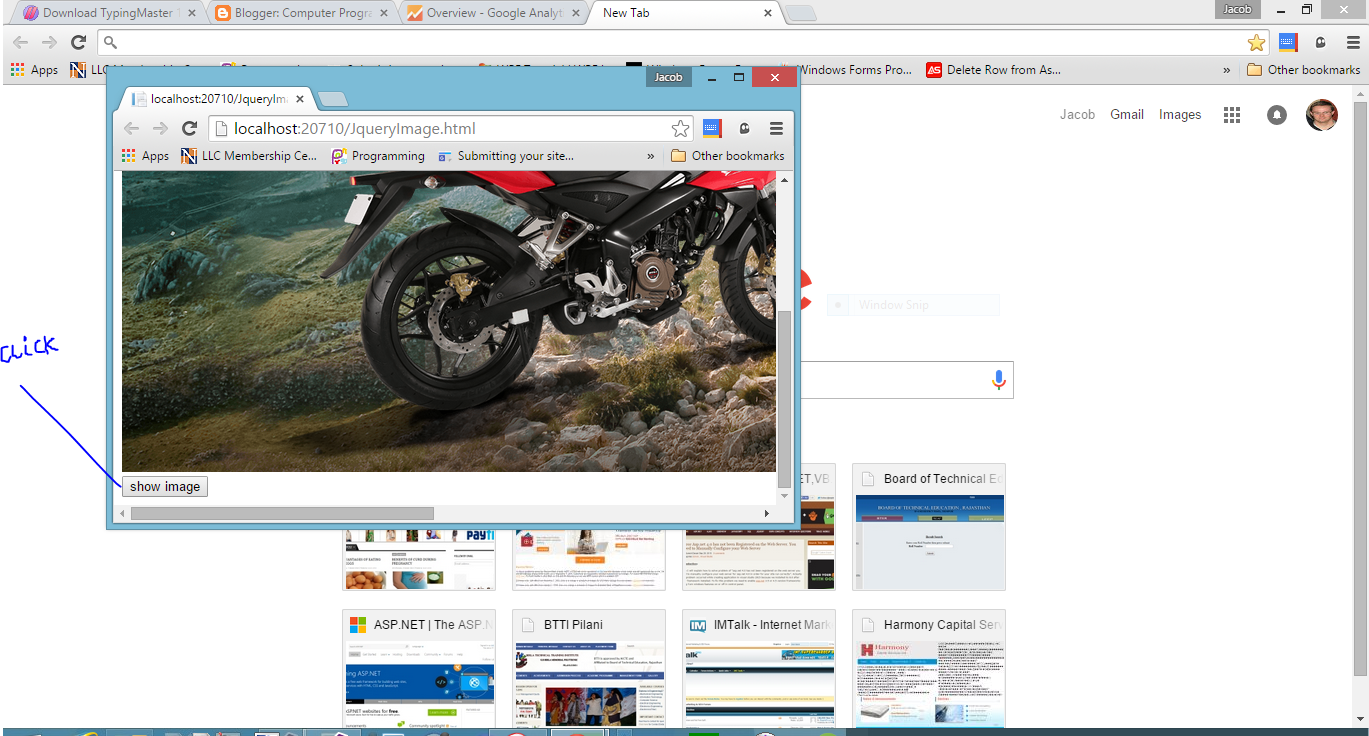
In this article i will show you how to add image tag dynamically using JQuery. In this article i will show you how to add image tag using JQuery/JavaScript. First of all add a .JS script in the page. When we click on button then generate a jquery function. In this function, first to add a image tag with "$" sign. Also add image attribute with the image . Add dynamically created image in the division.


<!DOCTYPE html>
<html xmlns="http://www.w3.org/1999/xhtml">
<head>
    <title></title>
    <script src="Scripts/jquery-1.10.2.js"></script>
    <script>
        $(function () {
            $("#btnimg").click(function () {
                var img = $('<img id="runtime">');
                img.attr('src', "image/12.png");
                img.appendTo("#div1");
            });


        });
    </script>
</head>
<body>
    <div id="div1">

    </div>
    <input type="button" id="btnimg" value="show image"/>

</body>
</html>

Code generate the following output:

JQuery: image tag created dynamically


Tuesday, October 6, 2015

jQuery Crop Image in Asp.net using Jcrop jQuery and Upload to Folder

Introduction
In this article i will show you how to crop image using JQuery, In previous article i was show you how to define the crop section of the image using JQuery. In this article i will show you how to upload cropped image into specified directory using ASP.NET c#. Copy this code and paste into your page.


Source code :

<%@ Page Language="C#" AutoEventWireup="true" CodeFile="cropimage.aspx.cs" Inherits="cropimage" %>

<!DOCTYPE html>

<html xmlns="http://www.w3.org/1999/xhtml">
<head runat="server">
    <title></title>
    <script src="http://code.jquery.com/jquery-1.8.2.js"></script>
    <link href="jquery.Jcrop.css" rel="stylesheet" />
    <script src="jquery.Jcrop.js"></script>
    <script>
        $(function () {
            $("#cropimage1").Jcrop({
                onSelect: croparea

            });
        });
        function croparea(c) {
            $("#coordinate_x").val(c.x);
            $("#coordinate_y").val(c.y);
            $("#coordinate_w").val(c.w);
            $("#coordinate_h").val(c.h);
        }


    </script>
    
</head>
<body>
    <form id="form1" runat="server">
    <div>
        <img src="image/12.PNG" id="cropimage1" runat="server" />
        <input type="hidden" id="coordinate_x" runat="server"/>
          <input type="hidden" id="coordinate_y" runat="server"/>
          <input type="hidden" id="coordinate_w" runat="server"/>
          <input type="hidden" id="coordinate_h" runat="server"/>
        <asp:Button ID="Button1" runat="server" Text="Crop" OnClick="Button1_Click" />
        <img src="" id="cropimg" runat="server" visible="false" />
    
    </div>
    </form>
</body>
</html>

Code behind code

using System;
using System.Collections.Generic;
using System.Drawing;
using System.IO;
using System.Linq;
using System.Web;
using System.Web.UI;
using System.Web.UI.WebControls;
using Image = System.Drawing.Image;

public partial class cropimage : System.Web.UI.Page
{
    protected void Page_Load(object sender, EventArgs e)
    {

    }
    protected void Button1_Click(object sender, EventArgs e)
    {
        string filename = "12.PNG";
        string filepath = Path.Combine(Server.MapPath("~/image"), filename);
        Image outputfile = Image.FromFile(filepath);
        Rectangle cropcoordinate = new Rectangle(Convert.ToInt32(coordinate_x.Value), Convert.ToInt32(coordinate_y.Value), Convert.ToInt32(coordinate_w.Value), Convert.ToInt32(coordinate_h.Value));
        string confilename, confilepath;
        Bitmap bitmap = new Bitmap(cropcoordinate.Width, cropcoordinate.Height, outputfile.PixelFormat);
        Graphics grapics = Graphics.FromImage(bitmap);
        grapics.DrawImage(outputfile, new Rectangle(0, 0, bitmap.Width, bitmap.Height), cropcoordinate, GraphicsUnit.Pixel);
        confilename = "Crop_" + filename;
        confilepath = Path.Combine(Server.MapPath("~/cropimag"), confilename);
        bitmap.Save(confilepath);
        cropimg.Visible = true;
        cropimg.Src = "~/cropimag/" + confilename;


    }
}

In this aricle i have two file for cropping the image , first to download the file from this url. Now in the code behind use Rectangle class is used to defined the section of the image. Now put the coordinate,which is retrieved from JQuery Jcrop function into the rectangle class. 

Sunday, October 4, 2015

JQuery: ScrollTop Button in Bottom right corner

Introduction
In this article i will show you how to design Scroll Top button in bottom right corner also when we click on it then we reach at top position of web browser. I will give an example of ScrollTop button which is used to scroll the page at top position.


Description 
First to design the button at bottom right corner using this line of code.

<div align="right">
        <a href="javascript:;" id="scrolltop1">&#x25B2;</a>
    </div>
After that apply formatting on button using css class.

<style>
        #scrolltop1{
            cursor:pointer;
            background-color:#00abcd;
            display:inline-block;
            height:50px;
            width:50px;
            color:#fff;
            font-size:14px;
            text-align:center;
            text-decoration:none;
            line-height:50px;


        }
    </style>

Now, scroll the page using script file, which is mentioned below.
 <script src="http://ajax.googleapis.com/ajax/libs/jquery/1.8.3/jquery.min.js"></script>
    <script>
        $(function () {
            $('#scrolltop1').bind("click", function () {
                $('html,body').animate({ scrollTop: 0 }, 1000);
                return false;
            })

        })
    </script>
In this script function when we click on hyperlink button, which is mentioned in bottom right corner then run animate function. In animate function we have one property that is scrollTop which is used to scroll the page.

Complete Source code


<!DOCTYPE html>
<html xmlns="http://www.w3.org/1999/xhtml">
<head>
    <title>ScrollTop Button in Bottom Right Corner</title>
    <style>
        #scrolltop1{
            cursor:pointer;
            background-color:#00abcd;
            display:inline-block;
            height:50px;
            width:50px;
            color:#fff;
            font-size:14px;
            text-align:center;
            text-decoration:none;
            line-height:50px;


        }


    </style>
    <script src="http://ajax.googleapis.com/ajax/libs/jquery/1.8.3/jquery.min.js"></script>
    <script>
        $(function () {
            $('#scrolltop1').bind("click", function () {
                $('html,body').animate({ scrollTop: 0 }, 1000);
                return false;


            })


        })


    </script>
 
</head>
<body>
   Welcome to dotprogramming.blogspot.com<br/>
    Welcome to dotprogramming.blogspot.com<br />
    Welcome to dotprogramming.blogspot.com<br />
    Welcome to dotprogramming.blogspot.com<br />
    Welcome to dotprogramming.blogspot.com<br />
    Welcome to dotprogramming.blogspot.com<br />
    Welcome to dotprogramming.blogspot.com<br />
    Welcome to dotprogramming.blogspot.com<br />
    Welcome to dotprogramming.blogspot.com<br />
    Welcome to dotprogramming.blogspot.com<br />
    Welcome to dotprogramming.blogspot.com<br />
    Welcome to dotprogramming.blogspot.com<br />
    Welcome to dotprogramming.blogspot.com<br />
    Welcome to dotprogramming.blogspot.com<br />
    Welcome to dotprogramming.blogspot.com<br />
    Welcome to dotprogramming.blogspot.com<br />
    Welcome to dotprogramming.blogspot.com<br />
    Welcome to dotprogramming.blogspot.com<br />
    Welcome to dotprogramming.blogspot.com<br />
    Welcome to dotprogramming.blogspot.com<br />
    Welcome to dotprogramming.blogspot.com<br />
    Welcome to dotprogramming.blogspot.com<br />
    Welcome to dotprogramming.blogspot.com<br />
    Welcome to dotprogramming.blogspot.com<br />
    Welcome to dotprogramming.blogspot.com<br />
    v
    Welcome to dotprogramming.blogspot.com<br />
    Welcome to dotprogramming.blogspot.com<br />
    Welcome to dotprogramming.blogspot.com<br />
    Welcome to dotprogramming.blogspot.com<br />
    Welcome to dotprogramming.blogspot.com<br />
    Welcome to dotprogramming.blogspot.com<br />
    Welcome to dotprogramming.blogspot.com<br />
    Welcome to dotprogramming.blogspot.com<br />
    Welcome to dotprogramming.blogspot.com<br />
    Welcome to dotprogramming.blogspot.com<br />
    Welcome to dotprogramming.blogspot.com<br />
    Welcome to dotprogramming.blogspot.com<br />
    Welcome to dotprogramming.blogspot.com<br />
    Welcome to dotprogramming.blogspot.com<br />
    Welcome to dotprogramming.blogspot.com<br />
    <div align="right">
        <a href="javascript:;" id="scrolltop1">&#x25B2;</a>
    </div>
</body>
</html>

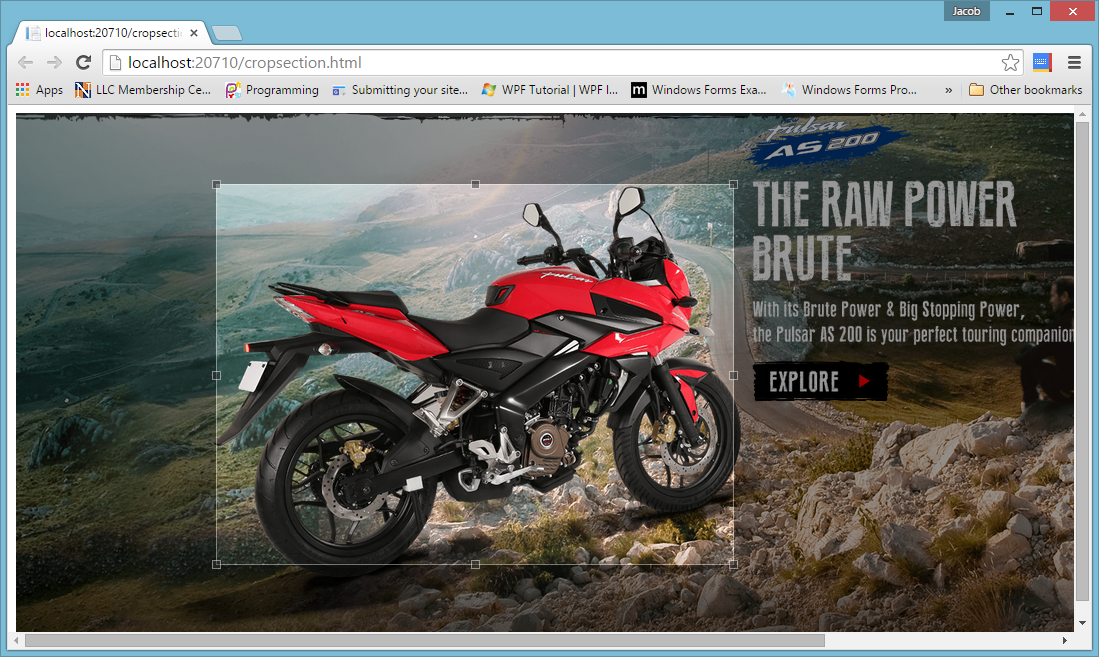
JQuery: Define crop section area of image

If you want to crop image then use JQuery Crop plugin. Download JQuery Crop Plugin from Here. Here you get two file, first is jquery.JCrop.js and second one is jquery.Jcrop.css file. Both of these files are used to set the crop section area on image. Lets check the example of Jquery crop section area of image.

<!DOCTYPE html>
<html xmlns="http://www.w3.org/1999/xhtml">
<head>
    <title></title>
    <script src="http://code.jquery.com/jquery-1.8.2.js"></script>
    <script src="jquery.Jcrop.js"></script>
    <link href="jquery.Jcrop.css" rel="stylesheet" />
    <script>
        $(function () {
            $("#cropimage").Jcrop({
                onSelect: croparea


            });

        })
        function croparea(c) {
            $("#coordinate_x").val(c.x);
            $("#coordinate_y").val(c.y);
            $("#coordinate_w").val(c.w);
            $("#coordinate_h").val(c.h);

        };

    </script>
</head>
<body>
    <div>
        <img src="image/12.PNG" id="cropimage"/>
        <input type="hidden" id="coordinate_x" />
        <input type="hidden" id="coordinate_y" />
        <input type="hidden" id="coordinate_w" />
        <input type="hidden" id="coordinate_h" />

    </div>

</body>
</html>

Code generate the following output

JQuery: Define crop section area of image

Thursday, October 1, 2015

Use pen paint tool online using html5 canvas with JQuery

Introduction
In this article i will show you how to draw using pencil, i mean to say your mouse cursor behaves like pencil on specific area of web browser. You can draw something on web browser using mouse cursor. Also you can use this for digital signature. Through this article i will explain how to design paint online for drawing something.


Description
In this article i will use Html5 canvas with JQuery. i will use canvas for drawing area and sketch.js file is used for drawing on it. I explained Button working as file upload control using JQuery, Open and close new window using Jquery , event inside event example in JQuery etc.

Source code:

<!DOCTYPE html>
<html xmlns="http://www.w3.org/1999/xhtml">
<head>
    <title></title>
    <script src="http://ajax.googleapis.com/ajax/libs/jquery/1.8.3/jquery.min.js"></script>
    <script src="http://intridea.github.io/sketch.js/lib/sketch.min.js"></script>
    <script>
        $(function () {
            $('#sketch').sketch();

            $(".digital a").eq(0).attr("style", "color:#ddd");
            $(".digital a").click(function () {
                $(".tools a").removeAttr("style");
                $(this).attr("style", "color:#000");
            });


            $("#savebtn").bind("click", function () {
                var base64 = $('#sketch')[0].toDataURL();
                $("#imgc").attr("src", base64);
                $("#imgc").show();
    });
        });
     </script>


</head>
<body>
    <div class="digital">
        <a href="#sketch" data-tool="marker">marker</a>
        <a href="#sketch" data-tool="remover">remover</a>
            </div>

    <br/>
    <canvas id="sketch" width="600" height="300"></canvas>
    <br/>
    <input type="button" id="savebtn" value="image save"/>
    <img id="imgc" alt="" style="display:none"/>


</body>
</html>

Code Generate the following output

© Copyright 2013 Computer Programming | All Right Reserved