According to previous post, Label control derives from Content Control and can: display other type of data as well as string, perform all the functions of a content control. There are some drawbacks in label control such as it cannot support multi line texts.
Textblock control is derived from Framework Element, and can display string type of data only. It has a property TextWrapping which is used to display our text in multiple lines. Means text block can be used to display paragraphs in WPF. A textblock can be drawn in XAML code with below line:
<TextBlock Text="text block" Width="200"/>
It will show the above text in the width specified. If we want to show some more text, then we have to use TextWrapping property of this textblock. If we don’t enable text wrapping then it will only show the text that can be shown in specified width.
Now when we run this code, it will show the text written above. The width will be fixed as 200 and height will be increased according to the given text.

If we also specified height here, then the text will not be shown. Just placed the height as 200 here and check out the output as:

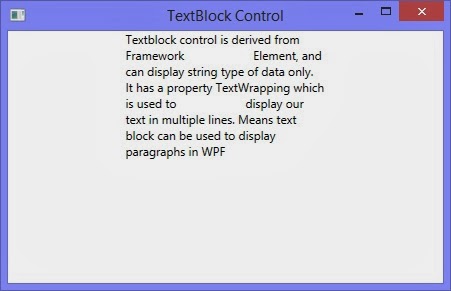
Textblock control is derived from Framework Element, and can display string type of data only. It has a property TextWrapping which is used to display our text in multiple lines. Means text block can be used to display paragraphs in WPF. A textblock can be drawn in XAML code with below line:
<TextBlock Text="text block" Width="200"/>
It will show the above text in the width specified. If we want to show some more text, then we have to use TextWrapping property of this textblock. If we don’t enable text wrapping then it will only show the text that can be shown in specified width.
<TextBlock Text="Textblock control is derived from Framework
Element, and can display string type of data only.
It has a property TextWrapping which is used to
display our text in multiple lines. Means text
block can be used to display paragraphs in WPF"
Width="200" TextWrapping="Wrap"/>
Element, and can display string type of data only.
It has a property TextWrapping which is used to
display our text in multiple lines. Means text
block can be used to display paragraphs in WPF"
Width="200" TextWrapping="Wrap"/>
Now when we run this code, it will show the text written above. The width will be fixed as 200 and height will be increased according to the given text.
If we also specified height here, then the text will not be shown. Just placed the height as 200 here and check out the output as: