In this article, I will show you how to check MVC version of application. There are two methods, through which we can get the version of MVC. In the first method we use property of System.Web.MVC namespace. But, How to check, check the mentioned snap shots.
1. Expand References folder
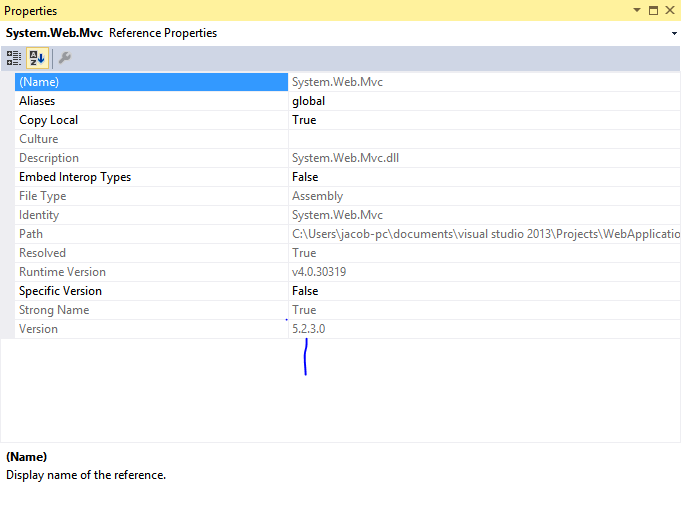
2. Right click on System.Web.MVC namespace also select property , check the mentioned snap.
In this article, I will show you, How to create Shadow of controls. Through this, we can show 3d view of control. First of all, I will apply this style on manually created designs like Ellipse, Rectangle etc. After that I will apply same things on controls. So, add a new window in the project. Add this code in between the <grid> ...</grid> section of xaml file.
BitmapEffect creates the shadow effect behind the object. In the above-mentioned code we have Direction attribute. With the help of Direction attribute we can show shadow of control at user defined position.
In my previous article i have already learned about hyperlink and their uses, we have already use hyperlink in different application like asp.net. Previous article coves all such things like hyperlink properties and methods. Today i am talking about hyperlink in MVC, and how to use it.
The given snap shows that how MVC work. According to the sanp view show the all tags of html. In MVC application, we use ActionLink extension of HtmlHelper. I have show the syntax and example of Hyperlink.
OK Done this is complete. Now, Today we have also learn how to bind hyperlink from database table in MVC. First to prepare the class for employee entity in model folder also map this with database table(mentioned in previous article), Now your code look like
using System;
using System.Collections.Generic;
using System.ComponentModel.DataAnnotations.Schema;
using System.Linq;
using System.Web;

namespace WebApplication10.Models
{
[Table("Employee")]
public class Employee
{
public int ID { get; set; }
public string Name { get; set; }
public int age { get; set; }

}
}
Prepare the Context class for connecting database in the same model folder.
using System;
using System.Collections.Generic;
using System.Data.Entity;
using System.Linq;
using System.Web;

namespace WebApplication10.Models
{
public class EmployeeContext: DbContext
{
public EmployeeContext()
: base("EmployeeConnection")
{

}
public DbSet<Employee> pl { get; set; }

}

}
Here EmployeeContext() constructor call the base class constructor for making connection. "EmployeeConnection" connectionString available in web.confog file. Prepare the controller class for responding the request, which is generated by the client.
public ActionResult linkEmp()
{
EmployeeContext context = new EmployeeContext();
List<Employee> employeelist = context.pl.ToList();
return View(employeelist);
}
Through the EmployeeContext class, first we retrieve all the data from the table and then store into the employee instance. Now, prepare the view for list of employee.
@model IEnumerable<WebApplication10.Models.Employee>
@using WebApplication10.Models;
@{
ViewBag.Title = "Show the particular employee";
}

<h2>Click to show the details of employee</h2>
<ol>
@foreach (Employee emp in @Model)
{
<li>@Html.ActionLink(emp.Name, "Index", new { id = emp.ID })</li>
}
</ol>
Here, we are using IEnumerable interface for collection and in the ActionLink Method, first argument of that method shows the name of the employee and second parameter show that method, which is call by hyperlink(Mentioned in Controller class) also method contain single parameter like id.
public ActionResult Index(int id)
{
EmployeeContext context = new EmployeeContext();
Employee emp = context.pl.Single(p2=>p2.ID==id);

return View(emp);
}
Code Generate the following output
After click on Tarun(Hyperlink), You will get the specific Employee Information.
Model-View-Controller(MVC) has been an important architectural pattern in computer science for many years. Originally named "Tbing-Model-View_Editor in 1979. It was later simplified to Model-View-Controller. It is a powerful and elegant means of separating concerns within an application (for example, separating data access logic from display logic) and applies itself extremely well to web applications.
The MVC separates the user interface of an application into three main aspects:
The Model : A set of classes that describes the data you're working with as well as the business rules for how the data can be changed and manipulated. The View : Defines how the application's user interface(UI) will be displayed. The Controller : A set of classes that handles communication from the user, overall application flow, and application specific logic.
Lets take an simple example : follow some steps for creating first MVC application Step-1: Goto file->New->project Step-2: In left panel select visual c# also select ASP.NET MVC 4 Web application.
Step-3: Select Empty project template in given project template. Also select Razor view engine from engine view and press OK
Step-4: : In solution explorer , Add new Controller using Right click on Controllers folder and select Add new Controller.
Step-5: Change Controller name (Default1->Home)
Step-6: Your controller contains Index method with action return. Now if you want to print string value then you must change ActionResult to string type. Now you can return string something like "Hello world".
MVC (Model View Controller), most usable framework for latest web programmer, enables programmer to separates their work in these three names. It is a lightweight and standard design pattern which is familiar to many web developers.
According to the name of this framework, the application divides itself in three things i.e. one contains your logic, one contains your pages (may be razor or aspx pages) and the last one will contain some classes which are used to control the pages redirecting per user clicks.
The following diagram shown about the layers of this framework which includes Business layer, display layer and input control.
Model, used to represent the core of web application. To interact with database tables there are some classes have to be written. Those classes must be placed in the model folder to follow the MVC framework. It means all the logic, works for the application, falls in this category.
View, used to decide about the display of data on the pages. Mostly views uses the model data, for the validation or may be other features. When we login in to application with invalid credentials, it requires some valid entries.
Controller, used to control the display data on the views by the model. It is the middle layer of the framework, which decides about what data are to be shown from the model and of course on which view.
Microsoft described some advantages of MVC based application:
It makes it easier to manage complexity by dividing an application into the model, the view, and the controller.
It does not use view state or server-based forms. This makes the MVC framework ideal for developers who want full control over the behavior of an application.
It uses a Front Controller pattern that processes Web application requests through a single controller. This enables you to design an application that supports a rich routing infrastructure. For more information, see Front Controller.
It provides better support for test-driven development (TDD).
It works well for Web applications that are supported by large teams of developers and for Web designers who need a high degree of control over the application behavior.
MVC is a framework used for building web application using latest and somewhat different approach. According to this architecture, whole application divides in to three part i.e. Model, View and Controller which is also the pronunciation stands for MVC.
Model: keeps the application core. It includes some classes written to interact with database.
View: how is to be displayed on the page? falls into this category.
Controller: what is to be transfer on the views? falls into this category.
More about MVC can be easily read through here, but we will start some practical work here. I suppose every DotNet programmer knows about Visual Studio. Let’s start with creating a new MVC application using below steps. Step 1. Create new project and select ASP.NET MVC 4 Web Application under the Web categories. Step 2. Change the directory where solution will exist, it takes default if not changed and click on OK button. Step 3. It will asks about the type of application e.g. empty, internet, intranet etc. listed in the image provided. Select Internet application because it loads the default controllers and their actions with authentication.
Through this we can only creating application, on the next we will code with empty MVC application. Step 4. Congratulation, you have successfully created a new MVC 4 application. Now run this with F5 or from Start debugging option in DEBUG menu. When it run it looks like the below image. In the browser’s address i.e. http://localhost:port/ localhost is the computer which is running that application at that time, means the client machine and the port is the number assigned for that application.
This article will cover, How to read data from Excel spreadsheet using ASP.NET. First we need to connect Microsoft Excel workbook using the OLEDB.NET data provider. Add excel file path to connectionString, after doing this the connectionstring will be look like
Here, you can connect .xls file using Microsoft.Jet.OLEDB.4.0 provider also display data into gridview. In Data Source, you can take .xls file path.
You can follow some steps for reading data from excel file.
Step 1: Open Visual Studio > File > New >Website > Under Templates, click ASP.NET WebSite and choose Visual C# as the language. Select a system location and click Ok.
Step 2: We will create excel sheet and add them to the website folder. Excel sheet will be created in Office 2003(first.xls).
Step 3: Add three column called id, name and Address to the Sheet1. Also add some data into the columns. Once these excel files are created, add them to your website folder. To add them to the solution, right click website name > Add Existing Item > Add the excel file.
Step 4: Add a web form called 'excelfile.aspx' into the website folder. Step 5: Add a GridView and label control to the 'excelfile.aspx' page. We will extract data from the excel file and bind it to the GridView on page_load method. Step 6: Bind GridView on page load method
Complete code is
<%@ Page Language="C#" AutoEventWireup="true" CodeFile="excelfile.aspx.cs" Inherits="excelfile" %> <!DOCTYPE html PUBLIC "-//W3C//DTD XHTML 1.0 Transitional//EN" "http://www.w3.org/TR/xhtml1/DTD/xhtml1-transitional.dtd"> <html xmlns="http://www.w3.org/1999/xhtml"> <head runat="server"> <title></title> </head> <body> <form id="form1" runat="server"> <div> <asp:GridView ID="GridView1" runat="server"> </asp:GridView> </div> <asp:Label ID="Label1" runat="server" Text="Label"></asp:Label> </form> </body> </html> using System; using System.Collections.Generic; using System.Linq; using System.Web; using System.Web.UI; using System.Web.UI.WebControls; using System.Data.OleDb; using System.Configuration; using System.Data; public partial class excelfile : System.Web.UI.Page { protected void Page_Load(object sender, EventArgs e) { string connString = "Provider=Microsoft.Jet.OLEDB.4.0;" + "Data Source=" + Server.MapPath("first.xls") + ";" + "Extended Properties=Excel 4.0;"; OleDbConnection oledbconn = new OleDbConnection(connString); try { oledbconn.Open(); OleDbCommand cmd = new OleDbCommand("Select * from [Sheet1$]", oledbconn); OleDbDataAdapter oleda = new OleDbDataAdapter(); oleda.SelectCommand = cmd; DataSet ds = new DataSet(); oleda.Fill(ds, "first"); GridView1.DataSource = ds.Tables[0].DefaultView; GridView1.DataBind(); } catch (OleDbException ex) { Label1.Text = ex.Message; } finally { oledbconn.Close(); } } }