-->

Saturday, August 23, 2014

Bind the Text property of a Text Box to the value property of a Slider in windows phone

Its a very simple method to bind Text Box from slider control in the windows phone. You can use Property="{Binding <source property>, ElementName=<Source Name>}" this method. Lets take an simple example
1. Add one Silder and One Text Box control on windows phone phone.

<Grid x:Name="ContentPanel" Grid.Row="1" Margin="12,0,12,0">
           
            <TextBox x:Name="txtbox1" HorizontalAlignment="Left" Height="72" Margin="33,139,0,0" TextWrapping="Wrap" VerticalAlignment="Top" Width="335" AcceptsReturn="True" Text="{Binding Value,ElementName=slider1}"></TextBox>

            <Slider x:Name="slider1" HorizontalAlignment="Left" VerticalAlignment="Top" Width="446" Margin="0,39,0,0" ValueChanged="slider1_ValueChanged"/>

        </Grid>

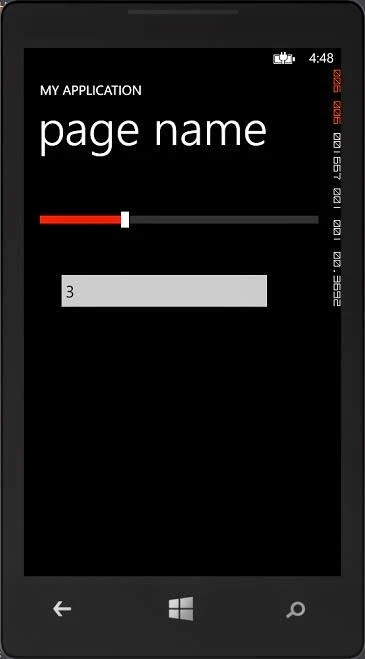
Code Generate the following output

Bind the Text property of a Text Box to the value property of a Slider in windows phone
If you want to show only integer number into text box then use Round( ) method of Meth class in ValueChanged event. Add this in .xaml.cs file

 private void slider1_ValueChanged(object sender, RoutedPropertyChangedEventArgs<double> e)
        {
            slider1.Value = Math.Round(e.NewValue);
        }
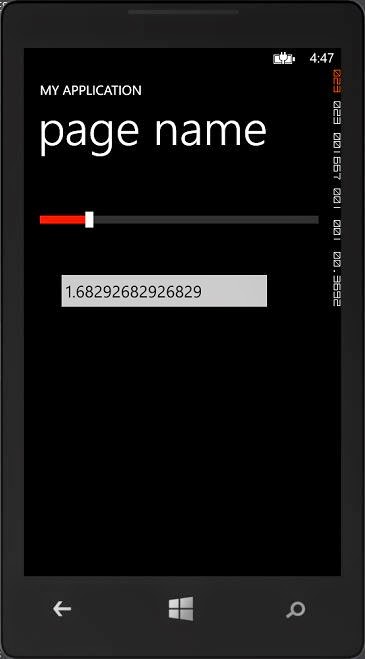
Code generate the following output

Bind the Text property of a Text Box to the value property of a Slider in windows phone

Friday, August 22, 2014

How to bind Text property of Text block to the text property of a text box in windows phone

Its a very simple method to bind Text Block from the Text Box in the windows phone. You can use Property="{Binding <source property>, ElementName=<Source Name>}" this method. Lets take an simple example
1. Add one Text Block and One Text Box control on windows phone phone.

Xaml code


 <Grid x:Name="ContentPanel" Grid.Row="1" Margin="12,0,12,0">
            <TextBlock Text="{Binding text,ElementName=txtbox1}" x:Name="txtblock" HorizontalAlignment="Left" Margin="63,74,0,0" TextWrapping="Wrap" VerticalAlignment="Top" Width="210"/>

            <TextBox x:Name="txtbox1" HorizontalAlignment="Left" Height="72" Margin="33,139,0,0" TextWrapping="Wrap" VerticalAlignment="Top" Width="335" AcceptsReturn="True"/>

        </Grid>

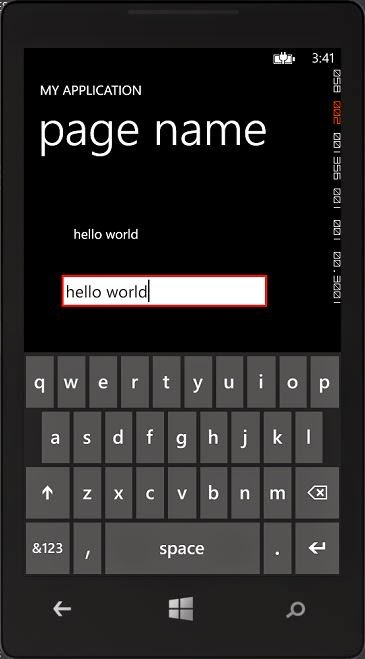
Code generate the following output

How to bind Text property of Text block to the text property of a text box in windows phone


Wednesday, August 20, 2014

How to send sms in Windows Phone

Through SmsComposeTask class, we can send sms from one number to other numbers. In this application, first we get the number from contact list, after get the number we will send the sms on this. In previous versions of windows mobile where in an application could send text messages without the users permission, or even knowledge, The SmsComposeTask launches the messaging application with either(or both) the phone number or the message body specified. This class exist in Microsoft.Phone.Tasks namespace. Lets take a simple example for sending message to the sender.

Xaml code


<Grid x:Name="ContentPanel" Margin="24,151,0,10" Grid.RowSpan="2">
            <TextBox HorizontalAlignment="Left" Height="72" Margin="10,24,0,0" TextWrapping="Wrap" Text="" VerticalAlignment="Top" Width="260" RenderTransformOrigin="0.173,0.208" Name="T1"/>

            <Button Content="get Number" HorizontalAlignment="Left" Margin="270,26,0,0" VerticalAlignment="Top" Width="176" Click="Button_Click"/>

            <Button Content="Send Sms" HorizontalAlignment="Left" Margin="76,284,0,0" VerticalAlignment="Top" Width="260" Click="Button_Click_1"/>

            <TextBox HorizontalAlignment="Left" Height="132" Margin="0,132,0,0" TextWrapping="Wrap" Text="" VerticalAlignment="Top" Width="446" Name="msgbody"/>

        </Grid>

Business logic code


using System;
using System.Collections.Generic;
using System.Linq;
using System.Net;
using System.Windows;
using System.Windows.Controls;
using System.Windows.Navigation;
using Microsoft.Phone.Controls;
using Microsoft.Phone.Shell;
using Microsoft.Phone.Tasks;

namespace phonetutorial
{
    public partial class getcontact : PhoneApplicationPage
    { 
        PhoneNumberChooserTask contact_detail = new PhoneNumberChooserTask();
        public getcontact()
        {
            InitializeComponent();
            contact_detail.Completed += selectnumber;
        }

        private void selectnumber(object sender, PhoneNumberResult e)
        {
            T1.Text = e.PhoneNumber;
        }

        private void Button_Click(object sender, RoutedEventArgs e)
        {
           
            contact_detail.Show();
        }

        private void Button_Click_1(object sender, RoutedEventArgs e)
        {
            SmsComposeTask sendsms = new SmsComposeTask();
            sendsms.To = T1.Text;
            sendsms.Body = msgbody.Text;
            sendsms.Show();

        }
    }
}

Code generate the following output

How to get phone number from their list of contacts in the windows phone

The PhoneNumberChooserTask class provide the way to retrieve the contact detail from windows phone. This class allow users to select a phone number from their list of contacts on the phone, you just need to create an instance of the PhoneNumberChooserTask and invoke its Show method. This class is exist in Microsoft.Phone.Tasks namespace.

XAML source code


 <Grid x:Name="ContentPanel" Margin="14,151,10,10" Grid.RowSpan="2">

            <TextBox HorizontalAlignment="Left" Height="72" Margin="10,24,0,0" TextWrapping="Wrap" Text="" VerticalAlignment="Top" Width="260" RenderTransformOrigin="0.173,0.208" Name="T1"/>

            <Button Content="get Number" HorizontalAlignment="Left" Margin="270,26,0,0" VerticalAlignment="Top" Width="176" Click="Button_Click"/>

        </Grid>

Logic Code


using Microsoft.Phone.Tasks;

namespace phonetutorial
{
    public partial class getcontact : PhoneApplicationPage
    { 
        PhoneNumberChooserTask contact_detail = new PhoneNumberChooserTask();
        public getcontact()
        {
            InitializeComponent();
            contact_detail.Completed += selectnumber;
        }

        private void selectnumber(object sender, PhoneNumberResult e)
        {
            T1.Text = e.PhoneNumber;
        }

        private void Button_Click(object sender, RoutedEventArgs e)
        {
           
            contact_detail.Show();
        }
    }
}

Code generate the following output

How to get phone number from their list of contacts in the windows phoneHow to get phone number from their list of contacts in the windows phone

How to get phone number from their list of contacts in the windows phone


This class is used where you want to select contacts which is inside in windows phone. Through this we can display all the contacts on the phone.

Friday, August 1, 2014

Bind ListBox with Image in windows Phone

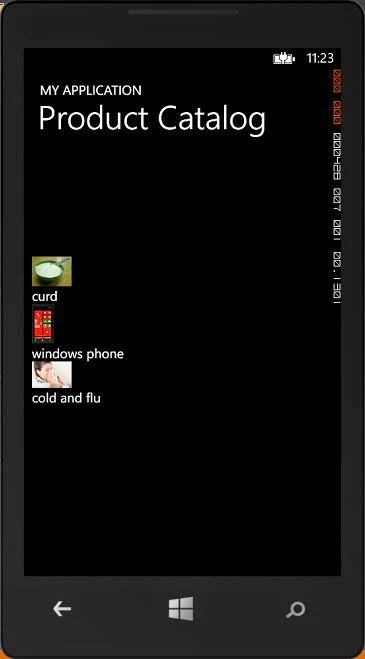
Its a Great application in which we can develop products catalog application. Lets take a simple example to show product image with product name time. If you want to show image with  text, first to create class products.cs with two properties in the project. Now your code look like
using System;
using System.Collections.Generic;
using System.Linq;
using System.Text;
using System.Threading.Tasks;

namespace WorldClock
{
    class products
    {
        public string  name { get; set; }
        public string imagepath { get; set; }
    }
}

Create a list collection with product type. Add some items into it. Now, after adding items, you can bind list with the list collection.
First to add ListBox in the page. Bind this with itemSource property, now add two control (Textblock and image) in DataTemplate.

<ListBox ItemsSource="{Binding}" ScrollViewer.VerticalScrollBarVisibility="Visible" Margin="0,152,19,243" x:Name="list1">
                <ListBox.ItemTemplate>
                    <DataTemplate>
                        <StackPanel Orientation="Vertical">
                        <Image x:Name=" img1" Source="{Binding ImagePath}" MaxWidth="50" MaxHeight="50" FlowDirection="LeftToRight" HorizontalAlignment="Left"></Image>
                            <TextBlock x:Name="t1" Text="{Binding timename}"></TextBlock>

                        </StackPanel>

                    </DataTemplate>

                   
                </ListBox.ItemTemplate>

            </ListBox>

create a list collection with product type in .cs file. Now add some items in list collection. Bind Listbox with list collection.

public partial class productitem : PhoneApplicationPage
    {
        public productitem()
        {
            InitializeComponent();
            List<products> p1 = new List<products>();
            p1.Add(new products() { name = "curd", imagepath = "image/curd.jpg" });
            p1.Add(new products() { name = "windows phone", imagepath = "image/phone.jpg" });
            p1.Add(new products() { name = "cold and flu", imagepath = "image/cold-and-flu.jpg" });
            list1.DataContext = p1;

        }
    }

Code Generate the following output

Bind ListBox with Image in windows Phone

Thursday, July 31, 2014

How to add item into the listBox in windows phone


ListBox is a container in which we can add strings. User can select by clicking. Article contain different topics , these are
 1. Add ListBox Control with items using XAML
 2. Add ListBox Control in code file


There are some basic steps to complete that tasks
Add ListBox control with items using XAML
Step-1 :  Add ListBox control in contentPanel using xaml code , now your code llok like
<ListBox x:Name=" ListBox1" >
 </ListBox>
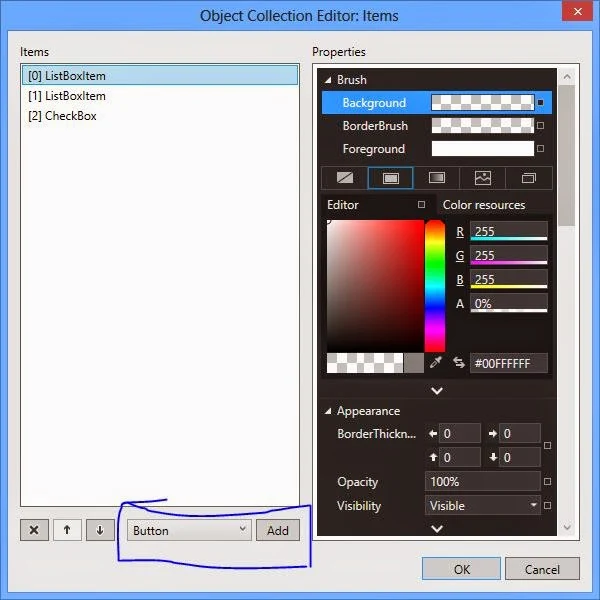
Step-2 :  Open ListBox properties and select Items(collection) ellipse symbol. After pressing ellipse button , A new window will appear
Open ListBox properties and select Items

Step-3 :  Using Object Collection Editor, add controls to the List Box by selecting controls from Dropdown List.
Object Collection Editor


Step-4  : After adding controls, you can assign content property of them.
Step-5 : Now, Press Ok button after adding items.
Step-6 : Now , Your complete code look like

<ListBox x:Name=" L1" >
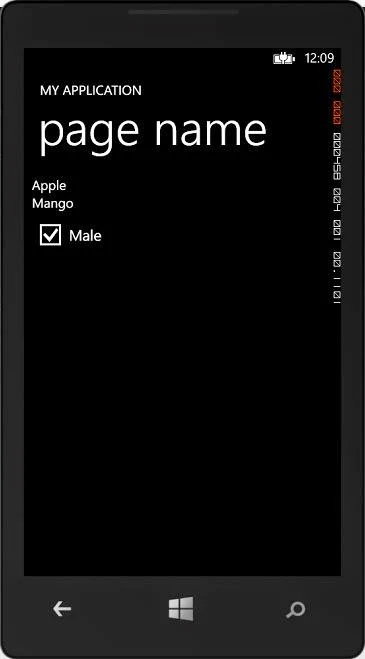
                <ListBoxItem Content="Apple"/>
                <ListBoxItem Content="Mango"/>
                <CheckBox Content="Male" IsChecked="True"/>

            </ListBox>

Code Generate the following output

How to add item into the listBox in windows phone

Wednesday, July 30, 2014

Getting started with windows phone App C#

Now start code with windows phone, first to develop app in windows phone. Get the tool you need, build your first app and test it in your system simulator. you can run this in your phone also. Before learning this article, must to learn XAML syntax. After that you can easily transfer your skills to develop windows phone app that use xaml for the UI and c#. 


This topic contains the following sections.

Get set up
Create your first app
Get set up
Download the Windows Phone SDK 8.0, which includes all the tools you need to create Windows Phone apps: Microsoft Visual Studio Express 2012 for Windows Phone, project templates for creating new Windows Phone apps, the Windows Phone emulator for testing, and more.
Create your first app

he first step in creating a Windows Phone app is to create a new project in Visual Studio.
To create the project

  1. Make sure you’ve downloaded and installed the Windows Phone SDK. 
  2. Launch Visual Studio from the Windows Start screen. If the Registration window appears, you can register the product, or you can temporarily dismiss the prompt.
  3. Create a new project by selecting the FILE | New Project menu command.
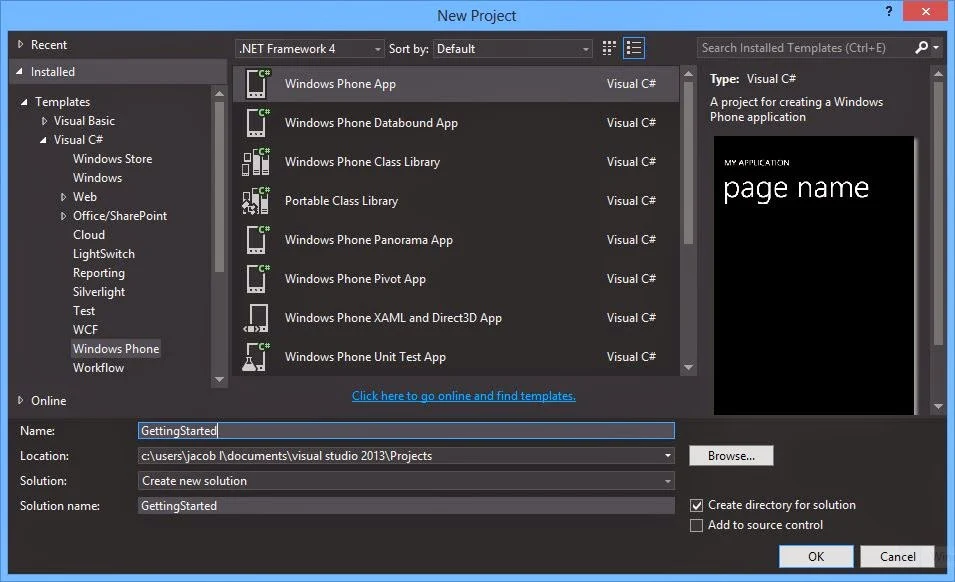
  4. In the New Project window, expand the installed Visual C# or Visual Basic templates, and then select the Windows Phone templates.
  5. In the list of Windows Phone templates, select the Windows Phone App  template.Create your first app
  6. Add TextBlock from toolBox into ContentPanel, now your code look like

<Grid x:Name="ContentPanel" Grid.Row="1" Margin="12,0,12,0">
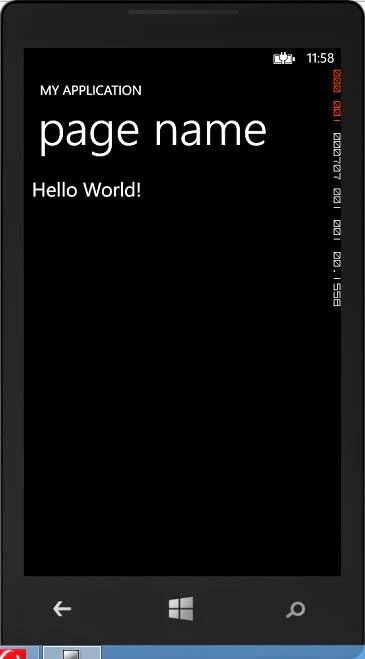
            <TextBlock HorizontalAlignment="Left" TextWrapping="Wrap" Text="Hello World!" FontSize=" 30" VerticalAlignment="Top"/>

        </Grid>

Code Generate the following output


Getting started with windows phone App C#
© Copyright 2013 Computer Programming | All Right Reserved