-->

Tuesday, April 7, 2015

Cancel Ticket in ASP.NET c#

For cancel the ticket, first to learn how to book the ticket. In similar ways you can check your reserved ticket. In this example, i will delete the entry one by one. First to check the ticket, which is available in the table. Only those ticket will be removed, which is related to loggedIn user.

 private bool checkseat()
 {
 con.Open();
 cmd.CommandText = "select seatno from [Booking] where date=@ldate and userId=@userid12";
 cmd.Parameters.AddWithValue("@ldate", ticketbooking.Text);
 cmd.Parameters.AddWithValue("@userid12", 1);
 cmd.Connection = con;
 SqlDataReader rd = cmd.ExecuteReader();
 while (rd.Read())
 {


 if (rd["seatno"].ToString() == ticketnotxt.Text)
 {
 flag = false;
 break;
 }


 }
 rd.Dispose();
 if (flag == false)
 return true;
 else
 return false;
 }
In this example first to get the seat_no with where clause. Resultant value will be compared to the text box value, if match then delete the table. If match the data with reader then code return true.  Now, you can easily remove the ticket.


Cancel Ticket in ASP.NET c#


if (checkseat() == true)
{

cmd.CommandText = "delete from [Booking] where seatno=@seaatno11 and userid=@userid11 and date=@date11";
cmd.Parameters.AddWithValue("@seaatno11",tktno);
cmd.Parameters.AddWithValue("@userid11",1);
cmd.Parameters.AddWithValue("@date11",tktdate);
cmd.ExecuteNonQuery();
resultlbl.Text = "Cancel Ticket Sucessfully";
resultlbl.ForeColor = System.Drawing.Color.Red;
}

Ticket booking in asp.net c#

Before doing this first to learn how to register and login into the site because without login you can not book your ticket. This code is used for in any project (Online movie ticketing, railway reservation, airline reservation, etc), which you want to design it. I will take simple method for design this. First to design database table for this type of application. I have a table, which query is mentioned bellow:

I method


Ticket booking in asp.net c#

CREATE TABLE [dbo].[Booking] (
[BookingId] INT IDENTITY (1, 1) NOT NULL,
[seatno] NVARCHAR (MAX) NULL,
[userId] INT NULL,
[date] NVARCHAR (MAX) NULL,
[movie_id] INT NULL,
PRIMARY KEY CLUSTERED ([BookingId] ASC)
);

After design the database table you can insert seat_no in it with some specific data, such as userId, date, movie_id. Before inserting data into table, first to check whether the seat_no is already reserved ot not. check this mentioned bellow code for this:


private bool checkseat()
{
string seats=seattxt.Text; 
string[] seatres=seats .Split(','); 
cmd.CommandText = "select * from [Booking]"; 
cmd.Connection = con;
SqlDataReader rd = cmd.ExecuteReader();
while (rd.Read()) 
{
string alrbook = rd["seatno"].ToString(); 
string[] reseat = alrbook.Split(','); 
foreach (string item in seatres)
{
foreach (string item2 in reseat) 
{
if (item==item2) 
{

flag =false;

break;
}
}

}
}
rd.Dispose();
cmd.Parameters.Clear();
if(flag ==false)
return true;
else
return false;

}

Suppose your entered seat_no is not matched with already reserved seat_no then you can book new ticked, which is enter in TextBox. Otherwise you are not permitted.


if (checkseat() == false)

{
cmd.CommandText = "insert into [Booking](seatno,userId,date,movie_id)values(@seatno1,@userid1,@date1,@movieid1)";
cmd.Connection = con;

seat_amount = seat_amount * count;
cmd.Parameters.AddWithValue("@seatno1", s);
cmd.Parameters.AddWithValue("@userid1", 1);
cmd.Parameters.AddWithValue("@date1", mdatelbl.Text);
cmd.Parameters.AddWithValue("@movieid1", 1);

amounttxt.Text = seat_amount.ToString();

cmd.ExecuteNonQuery();
}
else
{
Response .Write ("Change seat no");

}
already reserved seat_no

II method to reserve the ticket

In the second method you can save your ticket separately in different rows.

you can save your ticket separately in different rows

    In this method first to check Seat_availability, which is mentioned above. Only single statement should change in above mentioned code that is:

private bool checkseat()
 {
 string seats=seattxt.Text;
 string[] seatres=seats .Split(',');
 cmd.CommandText = "select * from [Booking]";
 cmd.Connection = con;
 SqlDataReader rd = cmd.ExecuteReader();
 while (rd.Read())
 {
 string alrbook = rd["seatno"].ToString();
 
 foreach (string item in seatres)
 {
 
 if (item==alrbook)
 {

 flag =false;
 
 break;
 }
 
 
 }


 }
 rd.Dispose();
 cmd.Parameters.Clear();
 if(flag ==false)
 return true;
 else
 return false;
 
 }

Now, you can book your ticket , if seat is available. Create the parameter inside the foreach loop and save the value one by one


foreach (string item in s1)
 {
 
 cmd.CommandText = "insert into [Booking](seatno,userId,date,movie_id)values(@seatno"+c1+",@userid"+c1+",@date"+c1+",@movieid"+c1+")";


 seat_amount = seat_amount * count;
 cmd.Parameters.AddWithValue("@seatno"+c1, item);
 cmd.Parameters.AddWithValue("@userid"+c1, 1);
 cmd.Parameters.AddWithValue("@date"+c1, mdatelbl.Text);
 cmd.Parameters.AddWithValue("@movieid"+c1, 1);
 cmd.ExecuteNonQuery();
 c1++;
 
 }

In the next example, i will show you, how to cancel the ticket easily. Only those ticket will be removed, which is reserved by the user.

Integrate paypal into ASP.NET

Through this you can access payment via paypal this process is known as e-payment(electronic payment). Today we will talk about integration. So first to open https://developer.paypal.com/. If you have already an account on it please login into the account. If you have not, please first to register in the paypal. Now after login into your account, select sandbox account in the Applications tab. Now, create two new account on paypal. First for business(merchant) and second for personal. Step-1 : first to create a new test account for business.
first to create a new test account for business in paypal

Fill all the required field and press to "create account" button. Similarly again Step-2: Create a new account for Personal Step-3 : Now, Enter into selling Test account.
Create a new account for Personal in paypal

After select the link, a new window will appear. Yet, login into your selling account by the business user name and password(do not use your actual username and password), in which you can create a code for selling products and services. Step-4 : Now, select "merchant services" tab. It has provide many services, such as (a) Create payment button for website (b) Send Invoices online for fast payment (c)  Swipe cards on your mobile phone (d) Accept payments on eBay Step-5 : In this given option i have select first option, which is " Create payment button for website". Step-6 : Now, create a new buy button for your website, so fill all required filled, which is given below.

create a new buy button for your website in paypal

  Step-7: Copy this code and paste into your web form. Now run your web form application. Step-8 : Click on "Buy Now" and purchase item from personal account, which is created on previous step.
Integrate paypal into ASP.NET


You can pay your bill using personal account. Also another option is available in which  you can pay your bill using debit or credit card.

Monday, April 6, 2015

Items add in ComboBox , Windows Store app

Design Page

<Page
    x:Class="App1.MainPage"
    xmlns="http://schemas.microsoft.com/winfx/2006/xaml/presentation"
    xmlns:x="http://schemas.microsoft.com/winfx/2006/xaml"
    xmlns:local="using:App1"
    xmlns:d="http://schemas.microsoft.com/expression/blend/2008"
    xmlns:mc="http://schemas.openxmlformats.org/markup-compatibility/2006"
    mc:Ignorable="d">

    <Grid Background="{ThemeResource ApplicationPageBackgroundThemeBrush}">
        <ComboBox x:Name="combo1" HorizontalAlignment="Left" Margin="128,130,0,0" VerticalAlignment="Top" Width="272"/>
        <TextBlock HorizontalAlignment="Left" Margin="115,57,0,0" TextWrapping="Wrap" Text="Select Your Items" FontSize="20" VerticalAlignment="Top" Height="35" Width="285"/>

    </Grid>
</Page>

// Code behind code


using System;
using System.Collections.Generic;
using System.IO;
using System.Linq;
using System.Runtime.InteropServices.WindowsRuntime;
using Windows.Foundation;
using Windows.Foundation.Collections;
using Windows.UI.Xaml;
using Windows.UI.Xaml.Controls;
using Windows.UI.Xaml.Controls.Primitives;
using Windows.UI.Xaml.Data;
using Windows.UI.Xaml.Input;
using Windows.UI.Xaml.Media;
using Windows.UI.Xaml.Navigation;

// The Blank Page item template is documented at http://go.microsoft.com/fwlink/?LinkId=234238

namespace App1
{
    /// <summary>
    /// An empty page that can be used on its own or navigated to within a Frame.
    /// </summary>
    public sealed partial class MainPage : Page
    {
        public MainPage()
        {
            this.InitializeComponent();
            combo1.Items.Add("Button Control");
            combo1.Items.Add("Label Control");
            combo1.Items.Add("Media control");

        }
    }
}

Code Generate the following output

Items add in ComboBox , Windows Store app

Example of Hyperlink control in windows store app Tutorial

How to Navigate from page to specific URL

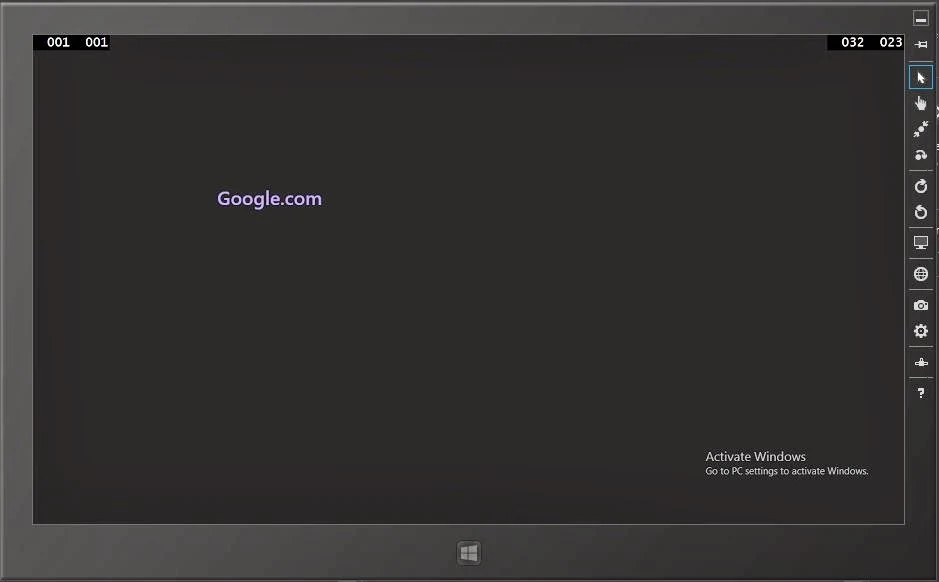
 Add HyperlinkButton control with specified code , code is

<Grid Background="{ThemeResource ApplicationPageBackgroundThemeBrush}">

        <HyperlinkButton FontSize=" 30" Content="Google.com" NavigateUri=" http://www.google.com" Margin="272,218,0,475" Height="75" />

    </Grid>

This code add into MainPage.xaml file
Code generate the following output
windows store How to Navigate from page to specific URLwindows store How to Navigate from page to specific URL


How to Navigate from one page to another page in windows store app tutorial

Add click event handler with HyperLinkButton control look like

Grid Background="{ThemeResource ApplicationPageBackgroundThemeBrush}">

        <HyperlinkButton Click="HyperlinkButton_Click" FontSize=" 30" Content="Move to Next page"  Margin="272,218,0,475" Height="75" />

    </Grid>
Add Handler code in MainPage.xaml.cs file

  private void HyperlinkButton_Click(object sender, RoutedEventArgs e)
        {
            this.Frame.Navigate(typeof(secondpage));

        }
Code Generate the following output
How to Navigate from one page to another page in windows store app tutorial

How to Navigate from one page to another page in windows store app tutorial

Windows Store: Hello World !

In this tutorial, you learn how to

  • Before you start
  • Create a new project
  • Hello World Output

Before you start...

Create a new project in Visual Studio

Step-1 : Launch Visual Studio 2013.
Step-2 : Select File > New Project.
Step-3 : In the left pane, expand Installed > Templates, then expand Visual Basic or Visual C# and pick the Windows Store template type.
Step-4 : In the center pane, select the Blank App template.
Step-5 : In the Name text box, enter name according you.
Step-6 : Click OK to create the project.

    <Page
    x:Class="App3.MainPage"
    xmlns="http://schemas.microsoft.com/winfx/2006/xaml/presentation"
    xmlns:x="http://schemas.microsoft.com/winfx/2006/xaml"
    xmlns:local="using:App3"
    xmlns:d="http://schemas.microsoft.com/expression/blend/2008"
    xmlns:mc="http://schemas.openxmlformats.org/markup-compatibility/2006"
    mc:Ignorable="d">

    <Grid Background="{ThemeResource ApplicationPageBackgroundThemeBrush}">
    <TextBlock Text="Hello World" FontSize="100" />
    </Grid>
    </Page>

    Windows Store: Hello World !

    if you run the application at this point, you should see a nice "Hello World" message. If you're running the default themes, it will be white text on a black background.


    Collapse or Expand slide using Java Script

    <!DOCTYPE html>
    <html>
    <head>
    <style type="text/css">
    div#box1
    {
        background-color : Gray;
        height:200px;
        width : 200px;
        overflow : hidden ;
    }


    </style>
    <script type ="text/javascript">
        function slideopen(ele) {
            var elem = document.getElementById(ele);
            elem.style.transition = "height 0.2s linear 0s";
            elem.style.height = "200px";
        }
        function slideclose(ele) {
            var elem = document.getElementById(ele);
            elem.style.transition = "height 0.2s linear 0s";
            elem.style.height = "0px";
        }

    </script>

        <title>Change Background color</title>
    </head>
    <body>
    <button onclick="slideopen('box1');"> slideopen</button>
    <button onclick="slideclose('box1');"> slideclose</button>

    <div id="box1">Paste your content here</div>
    </body>
    </html>

    Code generate the following 

    Collapse or Expand slide using Java Script

    Collapse or Expand slide using Java Script
    © Copyright 2013 Computer Programming | All Right Reserved