Toolbox
The Toolbox contains a number of tabs and each tab contains a list of controls and components that can be dragged onto your Web form. The Toolbox is docked on the left-side of the IDE; however, if it is not visible, you can access the Toolbox from the View menu or press the CTRL+ALT+ X keys together to open it.There are different sets of controls available, depending on the type of the designer that is active in the editor. If you are designing a Web Form, you will get a specific set of tools that work with Web controls. If you are designing Windows Form, you will get a specific set of tools in the visual studio IDE for windows controls. If you are designing an XML document, there will be some other controls available within the TollBox. You can also add other customized tabs to the Toolbox wherein you can place your favorite controls and components or add your own customized controls.
The Code Editor Window
The Code Editor window allows you to write and edit code. You can press the F7 key to switch from the web Forms Designer to Code Editor. Alternatively, you can switch to code Editor by selecting View-->Code. You can use the same editor to create different types of files, such as text files and XML documents. In such a case, this window is called Text EditorIntellisense
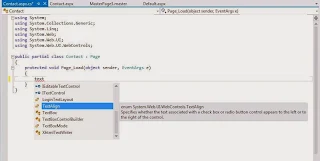
intelliSense is an extremely useful feature in visual studio. This, as you type the code, provides a list of options for making language references easily accessible and helps you in finding the information you need.Intellisense is very helpful, as it automatically completes typing for you. For example, when you type TextBox1 and then a period operator(.), Intellisense displays a list of options. Now you can directly enter the member function or variable by using the list of options.
The Intellisense technology makes writting of code easier and less prone to errors. It provides quick access to valid member functions or variables, including global variables through the members list. You can select these member functions and variables from the list and use it in your code. Intellisense is also used to view code comments, function declarations, and variable type information. By default, Intellisense works automatically. However, if you prefer to invoke Intellisense explicitly with a menu command or a key combination, disable it by turning it off selecting the Tools-->Options-->Text Editor-->All Languages-->General Option and then deselect the Auto members and Parameter information check boxes. Now, if you want to incorporate the intellisense functionality in the code, You will have to use the Intellisense menu item in the Edit menu.
Visual Studio provides a new features wherein you can make the Intellisense drop-down list transparent. To do so, press the CTRL key while the Intellisense drop-down list is open and you can see the Intellisense drop-down list in a transparent mode that enable you to look at the code without closing the Intellisense.
Various options available in Intellisense are as follows:
List Members- Displays a list of valid member variables or functions for the selected class or structure selecting from the list inserts the member into your code.Quick Info--Displays the complete declaration for any identifier in your code. Intellisense usually runs as soon as you type the period after a class instance. However, there are occasions where you need to force Intellisense to appear. For example, suppose you misspell a method name, then the Intellisense will not appear because of the wrong function name. You can bring Intellisense appear by pressing CTRL+j keys together. This allows you to select the appropriate method through Intellisense and replace the misspelled method name with the selected one.
Parameter info--Displays the complete declaration, including a parameter list for the method, such as number, name and types of parameters required by a method. You can also force Intellisense for parameter information for methods. For that, type an open parenthesis after the name of the function. Intellisense displays a complete list of the declaration function in a pop-up window and the first parameter appear in bold. By the time you specify the first parameter , the next parameter in the list is highlighted in bold. To close the list, you can press ESC at any time or keep typing the parameters till you complete the method. If you close the closing parenthesis, the parameter list also closes automatically.
Complete Word -- Shows the rest of a variable or function name once you have entered sufficient initial characters to differentiate the term. When you start typing a word and typed sufficient initial character so that it uniquely identifiers a given word in your current file, try pressing the CTRL+SPACEBAR+ keys together. The usual Intellisense drop-down list will be displayed by the specified starting characters. Simply select the appropriate word to complete the word quickly. If the series of starting letters uniquely identifies a single word in the Intellisense list, then the complete word will be inserted automatically. For example, to make the fontFamily property appear quickly on the code Editor, type font on the Code Editor. An Intellisense drop-Down list appear with options starting from Font, such as font, fontConverter, FontFamily, FontHeight. The moment you enter F, the selected item becomes FontFamily and you can press the Enter key to make the FontFamily word appear quickly on the code Editor.


