-->

Wednesday, September 3, 2014

Online result showing project in ASP.NET

Introduction

This is the web application, in which you can get result of your all semester exam. After completing the exam you will get total result via this application. The main objective of this application is to get the result from any where, Suppose you are  a student, and  you loss your mark sheet when you go for interview. Before taking interview you can get result via college website.

Hardware and Software requirement

Hardware : Dual Core PC for Server machine, where you setup your project.
Software : IIS Web Server, DOTNET framework 4.0, SQL Server 2008.

How to run the application on client machine

Step-1 : Open this website in visual studio 2010
Step-2 : Run the application via ctrl+f5
Step-3 : Search the result via SPN Number, which is include in database
Step-4 : Insert new record via admin panel.

Project nap Screen


Home screen show the links for navigate the application. After enter the SPN number into the project you can enter into the result page, which is shown above.

Download the project

mail to me :  narenkumar851@gmail.com

Project contains some resources

1. Project Source code
2. Project report
3. Project PPT

Saturday, August 30, 2014

Basics about JQUERY, Types of Selectors

To change the web page after rendered programmer has to change the coding done for the page and then refresh again. To manipulate a web page after it has been rendered without change the coding part, programmer often uses Jquery. Jquery library makes it easy to change the functionality of web page smoothly.

Jquery library provides tools that enable user to interact with the page or to include animations on page. This article will describe about some basic elements of jquery library, later we will implement some functionality on the page with tools provided by the library. To user jquery library programmer must have a reference on the web page or layout file.

Selecting an element/control on which programmer will perform some action, jquery library provides selectors. These selectors can select any element/control on the basis of their id, class or their type as per the requirement.

Showing an alert just after loading of the page, jquery provides an in-built function. Programmer can enable any functionality on loading of the page using below syntax.

$(document).ready(function(){
alert("page loaded");
});

First we need to know about how to select an element/control in jquery
Element Selector: To select an element on the page like <p/> (paragraph tag), <a/> (anchor tag), <input /> or any other element, programmer has to write something following below syntax:

$(document).ready(function(){
$('p').click(function(){
alert('<p> element selected');
});
$('a').click(function(){
alert('<a> element selected');
});
$('input').click(function(){
alert('<input> element selected');
});
});

Id selector: to select a control on basis of the id of that element, programmer needs to know about id selector. '#' symbol is used to select according to control's id like "$('#btnInput')" will select the control having id "btnInput". As we know that each control has its own id on the page and that is unique.

$(document).ready(function(){
$('#btnInput').click(function(){
alert('input button clicked');
});
});

Class selector: to select control(s) according to their CSS class property, this selector is used. Suppose we have multiple buttons having same class i.e. "button" so to apply some change on all of then we can do by using this selector.

$(document).ready(function(){
$('.button').click(function(){
alert('button clicked having class "button" ');
});
});

There are many jquery selectors in the library, we will use them one by one in later articles.

How to Create Layout page and set for View: MVC

After creating default MVC application in Visual Studio there is a default layout file has been added in shared folder under views having name _Layout.cshtml. This file is used to provide consistent look on all of the pages having default layout page set. Changes done in this file will set for all the pages/views under this layout.

The above extension ".cshtml" is used only in case of Razor and this will be changed for aspx views. Programmer can even change this layout file as per requirements or can use multiple layout files according to the roles/group  defined. All the scripts, styles and custom files must be included in this layout file if necessary for all views.

If Programmer don't want to use any layout for the view then "Layout = null" must be set in the view page. This feature can only be set for that particular view. Now to create new layout file programmer have to add new item as "MVC Layout Page(Razor)" and change the name if required otherwise default will be used.

MVC set layout null


After adding the layout file create html and use “@RenderBody()” statement wherever you want to render the body of view page which will have this layout. Whatever change we do in this file, will be changed for all the views having this file as a layout.

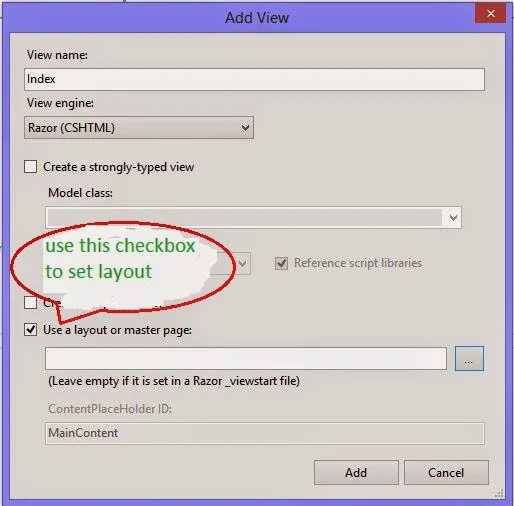
Whenever programmer adds a new view there is an option for using a layout or master file with a checkbox and browse button. Check that checkbox and browse for the layout file created above. This will set that file as a layout for that new view.

MVC set null in new view

Wednesday, August 27, 2014

How to view DLL function and properties in visual studio

You are a developers and you want to create a new project. Lots of code are hidden behind the .dll file, its a symbol of good programmer. Learn how to hide code from user in asp.net(How to create .DLL file in asp.net).   A .DLL file contains some namespaces, class definition, methods and some properties. You want to view the functions used in that dll so you should go for Object browser, which is available in visual studio. Lets take a step to view the .DLL file in visual studio.
Step-1: Right click on any .DLL file, Open selected file in Object Browser and press 'ok' Button.


Step-2 : Expand the file, which is contain namespace and methods.


Left panel contains files and right panel contains methods and properties and many more item which is related to selected file in left panel. So you can easily use namespace and their methods. Learn How to use this.

Saturday, August 23, 2014

Bind the Text property of a Text Box to the value property of a Slider in windows phone

Its a very simple method to bind Text Box from slider control in the windows phone. You can use Property="{Binding <source property>, ElementName=<Source Name>}" this method. Lets take an simple example
1. Add one Silder and One Text Box control on windows phone phone.

<Grid x:Name="ContentPanel" Grid.Row="1" Margin="12,0,12,0">
           
            <TextBox x:Name="txtbox1" HorizontalAlignment="Left" Height="72" Margin="33,139,0,0" TextWrapping="Wrap" VerticalAlignment="Top" Width="335" AcceptsReturn="True" Text="{Binding Value,ElementName=slider1}"></TextBox>

            <Slider x:Name="slider1" HorizontalAlignment="Left" VerticalAlignment="Top" Width="446" Margin="0,39,0,0" ValueChanged="slider1_ValueChanged"/>

        </Grid>

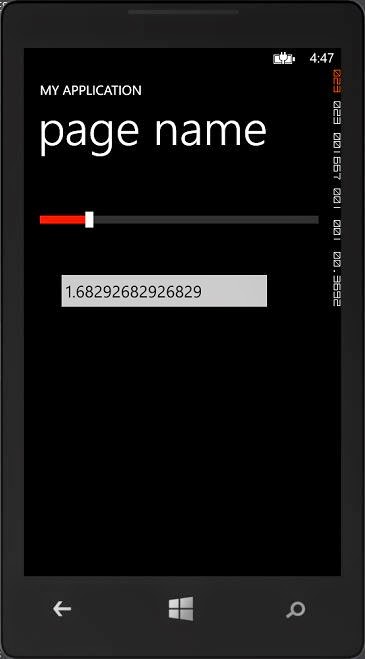
Code Generate the following output

Bind the Text property of a Text Box to the value property of a Slider in windows phone
If you want to show only integer number into text box then use Round( ) method of Meth class in ValueChanged event. Add this in .xaml.cs file

 private void slider1_ValueChanged(object sender, RoutedPropertyChangedEventArgs<double> e)
        {
            slider1.Value = Math.Round(e.NewValue);
        }

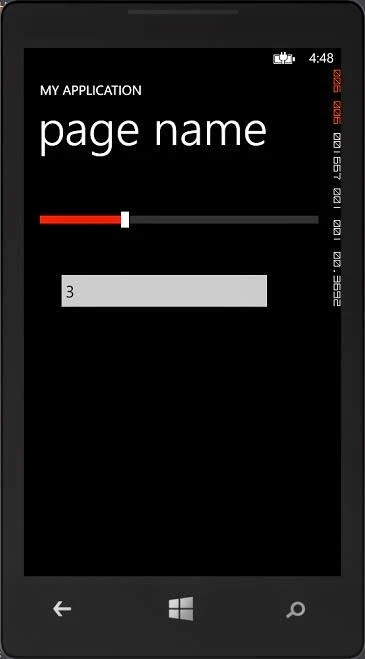
Code generate the following output

Bind the Text property of a Text Box to the value property of a Slider in windows phone

Friday, August 22, 2014

How to bind Text property of Text block to the text property of a text box in windows phone

Its a very simple method to bind Text Block from the Text Box in the windows phone. You can use Property="{Binding <source property>, ElementName=<Source Name>}" this method. Lets take an simple example
1. Add one Text Block and One Text Box control on windows phone phone.

Xaml code


 <Grid x:Name="ContentPanel" Grid.Row="1" Margin="12,0,12,0">
            <TextBlock Text="{Binding text,ElementName=txtbox1}" x:Name="txtblock" HorizontalAlignment="Left" Margin="63,74,0,0" TextWrapping="Wrap" VerticalAlignment="Top" Width="210"/>

            <TextBox x:Name="txtbox1" HorizontalAlignment="Left" Height="72" Margin="33,139,0,0" TextWrapping="Wrap" VerticalAlignment="Top" Width="335" AcceptsReturn="True"/>

        </Grid>

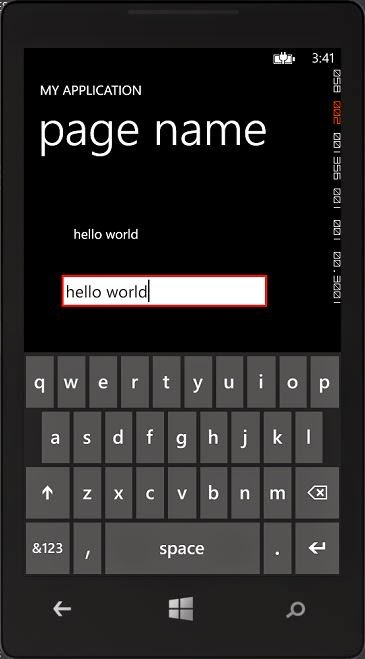
Code generate the following output

How to bind Text property of Text block to the text property of a text box in windows phone


Wednesday, August 20, 2014

How to send sms in Windows Phone

Through SmsComposeTask class, we can send sms from one number to other numbers. In this application, first we get the number from contact list, after get the number we will send the sms on this. In previous versions of windows mobile where in an application could send text messages without the users permission, or even knowledge, The SmsComposeTask launches the messaging application with either(or both) the phone number or the message body specified. This class exist in Microsoft.Phone.Tasks namespace. Lets take a simple example for sending message to the sender.

Xaml code


<Grid x:Name="ContentPanel" Margin="24,151,0,10" Grid.RowSpan="2">
            <TextBox HorizontalAlignment="Left" Height="72" Margin="10,24,0,0" TextWrapping="Wrap" Text="" VerticalAlignment="Top" Width="260" RenderTransformOrigin="0.173,0.208" Name="T1"/>

            <Button Content="get Number" HorizontalAlignment="Left" Margin="270,26,0,0" VerticalAlignment="Top" Width="176" Click="Button_Click"/>

            <Button Content="Send Sms" HorizontalAlignment="Left" Margin="76,284,0,0" VerticalAlignment="Top" Width="260" Click="Button_Click_1"/>

            <TextBox HorizontalAlignment="Left" Height="132" Margin="0,132,0,0" TextWrapping="Wrap" Text="" VerticalAlignment="Top" Width="446" Name="msgbody"/>

        </Grid>

Business logic code


using System;
using System.Collections.Generic;
using System.Linq;
using System.Net;
using System.Windows;
using System.Windows.Controls;
using System.Windows.Navigation;
using Microsoft.Phone.Controls;
using Microsoft.Phone.Shell;
using Microsoft.Phone.Tasks;

namespace phonetutorial
{
    public partial class getcontact : PhoneApplicationPage
    { 
        PhoneNumberChooserTask contact_detail = new PhoneNumberChooserTask();
        public getcontact()
        {
            InitializeComponent();
            contact_detail.Completed += selectnumber;
        }

        private void selectnumber(object sender, PhoneNumberResult e)
        {
            T1.Text = e.PhoneNumber;
        }

        private void Button_Click(object sender, RoutedEventArgs e)
        {
           
            contact_detail.Show();
        }

        private void Button_Click_1(object sender, RoutedEventArgs e)
        {
            SmsComposeTask sendsms = new SmsComposeTask();
            sendsms.To = T1.Text;
            sendsms.Body = msgbody.Text;
            sendsms.Show();

        }
    }
}

Code generate the following output

© Copyright 2013 Computer Programming | All Right Reserved