In my previous post, I have created a connection object and then get all the records from the database table. What if we want to bind our datagridview without writing a single line of code? So in this article we will do something like this.
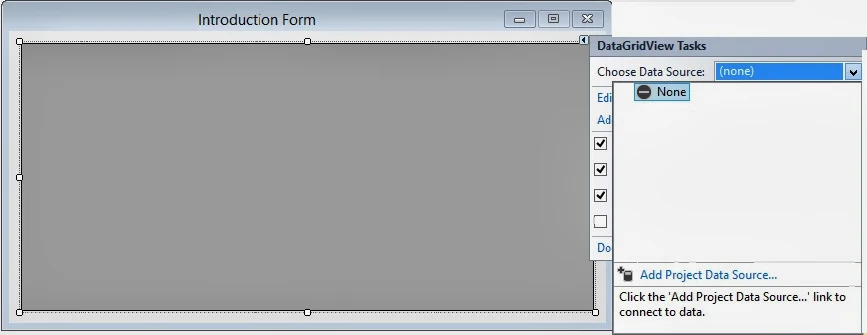
Just drag-n-drop a datagridview on the form and name it, if you want. A datagridview tasks pop-up menu appears automatically as shown:
Select the Choose Data Source drop-down list and then Add Project Data Source as shown:
Now Data Source Configuration wizard will open, select Database as your data source. The wizard will look like:
By clicking on Next button, It will prompt for the database model you want to use. Select dataset, it will determines the type of data objects our application will use.
In the next step we have to choose our connection that is used by the application use to connect to the database.
Click on New Connection and it will prompt for Choose Data Source dialog box having some more options to select.
Select Microsoft SQL Server which is used to connect to MS SQL Server, and the data provider should be .NET Framework Data Provider for SQL Server. Add Connection dialog box will appear as shown:
Write the server name as given “(LocalDb)\v11.0”, and select appropriate database name from the drop down list below. I have select StockDb here. Just click on Test Connection to check our connection succeeded or not.
Press ok and it will show Data Source Configuration wizard again with the specified connection and also connection string.
Choose the table name from the tree view shown. I have select Groups table because I want to show the records of groups table. Finish now with selecting the data set name. If you will forget the dataset name, it will used the by default name.
It will show the datagridview binding with the columns names of groups table as shown in the above image. Now run the project and look out the records bind to the datagridview
As I have said above, we have not wrote a single line of code.


