When we bind the data grid view with SQL Server database, then it will show all the columns created in the table of database. According to our previous post we have displayed all the records of table, without writing a single line of code.
Now in previous example all the columns are shown even the primary key of table. In this article we will remove those columns by some mouse clicks.
A datagridview tasks pop-up menu appears automatically, as shown in below image, click on Edit Columns link button.
By clicking on this link button, some column names are shown in left side and on the right side there are some properties of that particular selected column.
To remove a column, just select that and click on remove button (just below the selected columns panel), and it will be removed. We can easily change the header text of the particular column. Select a column and on the right side edit the value of Header Text.
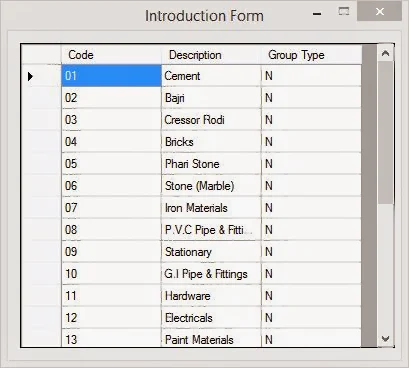
Perform the editing you want and at the last, click on ok button. All the settings you changed has been saved and when you run the project only three columns Code, Description and Type will be shown like:


